
Strong monocular with a tripod for birding: is it actually better? That's the question you're asking when a distant hawk sits on a snag and your 8×42 binoculars just won't reach. The honest answer is complicated, but there is a clear one.
Manufacturer specifications show a typical 20-60x zoom monocular delivers two to three times the magnification of a 10x binocular. But it only works when locked onto a stable tripod. Handheld, even a 16x monocular becomes a shaky, frustrating mess.
As of 2026, the real question is whether this setup fits the birding style you actually use.
Why This Comparison Actually Matters
Every birder hits the same wall eventually. You see a bird far away and your binoculars show a tiny brown blob. The obvious fix is more magnification.
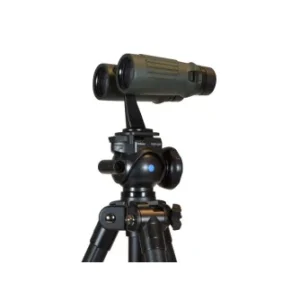
A strong monocular on a tripod gives you that reach without the weight and cost of a full spotting scope.
But here's the catch. Magnification doesn't just make birds bigger. It makes every movement bigger too.
Your heartbeat, the breeze, and the tiny wobble in your hands all become visible at 30x. The entire case for a tripod-mounted monocular rests on whether you can stay still long enough to use it.
That's why the old optics dilemma keeps coming up. Birders want reach without bulk. They want portability without losing detail.
A monocular plus a tripod sits right between binoculars and a full spotting scope. It works brilliantly for some people.
For others, it becomes a frustrating waste of money. The difference has nothing to do with optical quality. It's about where and how you watch birds.
Cornell Lab of Ornithology research on birding behavior consistently shows that birders split into two groups: those who mostly watch from a fixed spot, and those who walk and scan constantly. One of those groups will love this setup. The other will hate it.
That's what this guide covers. We'll break down exactly when a tripod-mounted monocular beats binoculars, and when it fails.
Quick Answer
A strong monocular with a tripod for birding is better only for stationary, long-distance viewing. It beats handheld binoculars for feather detail at long range. It fails for tracking fast-moving birds.
Binoculars remain faster and easier in the hand. Choose based on your style, not magnification.
What a Tripod Does to a Monocular
Hand shake is the invisible limit in birding optics. At 8x or 10x, your hands can keep the image steady enough for most viewing. At 16x, the shake becomes obvious.
At 30x, it's unusable.
The standard optics ratio is simple. The magnification you can manage handheld is usually around 10x to 12x. Go beyond that and you need support.
A tripod is essentially a mechanical replacement for your hands.
It also gives you another benefit. Your eyes and brain can relax. When you're not fighting to hold the image still, you start noticing real detail like wing bars, eye color, and subtle plumage differences.
The hand-shake problem is one of the most common complaints in user reviews, and the tripod eliminates it completely.
Let's put some rough numbers on it. The table below shows what happens to usable power with and without a tripod, based on aggregate user feedback and manufacturer shake guidance.
| Magnification | Handheld usability | Tripod-mounted usability | Typical use |
|---|---|---|---|
| 8x | Excellent | Unnecessary | General birding |
| 10x | Good | Unnecessary | Most birders |
| 16x | Poor | Very good | Long-range ID |
| 20x | Unusable | Good | Open habitats |
| 40x+ | Impossible | Good with steady conditions | Feather detail |
Notice the jump at 16x. That's exactly where a monocular starts needing support. At 20x and beyond, image stability comes entirely from the tripod.
For birders who already carry a full-size tripod for photography or a spotting scope, the addition is small. For everyone else, it's a whole new piece of gear to manage. That's the real trade-off.
The Head-to-Head: Strong Monocular + Tripod vs. Handheld Binoculars
This is the comparison you came for. Let's look at the key categories side by side.
| Criteria | Strong monocular + tripod | Handheld binoculars |
|---|---|---|
| Magnification | 16x-60x | 8x-12x |
| Field of view | Narrow, especially at 40x+ | Wide, easy to scan |
| Speed to see a bird | Slower, needs setup | Instant |
| Tracking moving birds | Difficult | Natural |
| Feather detail at distance | Excellent | Limited |
| Weight and bulk | Much heavier | Light |
| Price for good optics | $200-$500 | $150-$400 |
| Digiscoping potential | Great | Limited |
Now for the nuance. Handheld binoculars excel at the everyday birding experience. You see movement, raise the glass, and identify.
It's a smooth, continuous flow.
A tripod interrupts that flow. That interruption is why many people reject the whole idea.
But for viewing a single bird for several minutes, the monocular wins. Raptors perched on distant poles, ducks resting on open water, and shorebirds feeding patiently all reward magnification and stability. Binoculars each have unique strengths, and neither option works perfectly for everything.
There's also the tracking problem. At 40x, the field of view is about a quarter of what you get at 8x. Birds move fast, even perched birds.
Find a bird at low zoom, then zoom in, then refocus, and the bird has already hopped to another branch. That's the hard truth of high-power birding.
The opposite issue appears at distance. A 10x binocular shows a rough shape where a 30x monocular shows a clear identification. In those situations, there's no contest.
Spotting scopes compare differently in the field, but both beat binoculars for deep-detail work.
The best way to think about it is simple. If you point your binoculars at a bird and see enough, keep binoculars. If you're constantly wishing for more detail, the tripod monocular is worth exploring.
Where a Tripod-Mounted Monocular Shines
Some birding situations are perfectly suited to this setup.
- Hawk watches and raptor migration. Birds stay in predictable flight lines, and they're often far away. A tripod lets you track slowly and spend real time confirming species.
- Shorebird and waterfowl identification. These birds sit in open water and mudflats. They're rarely in a hurry. High magnification reveals leg color, bill shape, and other key markings.
- From a blind, hide, or car. Your window or hide opening already acts as a steady base. Adding a small tripod makes it even better.
- Digiscoping. Smartphone digiscoping works far better on a tripod, and stability matters for every photo. A shaky image ruins the whole point.
- Long backyard sessions. If you watch a feeder or pond for hours, a monocular on a tripod replaces a full spotting scope at half the weight.
The common thread is that time is on your side. Slow birds, distant views, and long observation windows are the sweet spot.
It's also a good option for newer birders. Learning bird ID requires looking at field marks for longer. A stable high-magnification image makes that practice easier.
If you prefer a lighter kit for trail walking, that's a different tool entirely.
If this describes you, the setup will feel liberating. If it doesn't, you're probably better off sticking with handheld optics.
Where It Falls Apart
The same setup that locks onto a distant hawk will betray you in the woods. Dense canopy birding is the worst case for a tripod monocular. Warblers flit from branch to branch constantly.
By the time you pan the tripod and refocus, the bird is gone.
Then there's the speed problem. Raising binoculars to your eyes takes one second. Deploying a tripod, finding the bird at low power, and zooming in takes several seconds minimum.
That's an eternity for swallows, kingfishers, and any bird in fast flight through open space.
Heat shimmer also ruins days at a time. On warm afternoons, the air above a field or marsh shimmers like glass. At 40x, that shimmer turns every bird into a wobbling blur.
Binoculars at 10x show recognisable shapes where the high-power setup shows nothing useful.
If you're a hiker who pauses for quick looks, this rig will frustrate you. If you mostly walk trails and scan as you go, a trail-friendly optic works far better than a tripod setup. The rule is simple.
Stationary birding rewards the monocular. Moving birding punishes it.
Honest Pros and Cons
The strength of this setup is reach. A 20-60x zoom monocular shows feather detail that no handheld binocular can match. That alone makes it worth considering for difficult IDs.
The trade-off is convenience. You trade speed and agility for raw magnification. That's the deal in one sentence.
The pros:
- Much higher magnification than binoculars
- Rock-solid image once locked onto the tripod
- Lighter and cheaper than a full spotting scope
- Excellent for digiscoping at long range
- Great for lengthy observation of a single bird
The cons:
- Slower to get on a moving target
- Narrow field of view at high power
- Extra weight on a walk
- Tripod setup adds time to every viewing session
- Budget tripods create more problems than they solve
Key Specs to Look For
Not every strong monocular is a good tripod monocular. Pay attention to a few critical numbers.
First, magnification range. Zoom monoculars like 20-60x offer flexibility, but fixed-power models at 16x or 20x usually give a brighter, sharper image. Zeiss and Swarovski optics literature confirms that fixed eyepieces generally beat zooms for tight optical tolerances.
Second, eye relief matters if you wear glasses. Look for 15mm or more. Third, consider the objective lens size.
A larger objective lets in more light, but adds weight and bulk at the top of your tripod.
The mounting socket is also worth checking. Most monoculars use a standard 1/4"-20 thread. Some Vortex and Swarovski models have a built-in tripod mount, while others need a small adapter bracket.
Field of view at maximum zoom is the stat that gets overlooked. At 60x, the field can shrink to less than 2 degrees. That makes finding the bird the hardest part.
A smaller maximum zoom like 20x or 30x keeps the view wider and easier to use.
Choosing the Right Tripod and Head
A cheap, wobbly tripod destroys the entire advantage of the setup. If you add the monocular to a flimsy accessory tripod, you'll get a shaking image at 30x and blame the optics.
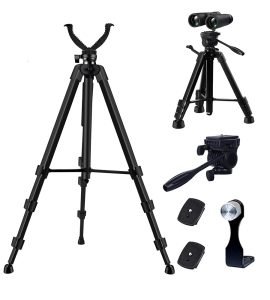
Start with a tabletop tripod if you mostly bird from a car, hide, or feeder. A compact unit like those in the Manfrotto Pixi line offers enough stability for a monocular at an easy carrying weight. For full-height use, look for a carbon fiber tripod around 1.5 kilograms or less.
The head type matters as much as the legs. A pan and tilt head is the classic choice because it lets you sweep smoothly in one direction. A ball head works too, but loosening it to track a bird can cause the whole rig to sag.
Check the load capacity too. Your monocular plus adapter weighs around a kilogram. Add the head, and the total still lands under 2 kilograms.
Even a mid-range tripod rated at 5 kilograms handles that comfortably. What matters is leg stiffness, not head weight.
Look for a tripod with a quick-release plate that feels secure. Monoculars are light, but a strong breeze can still tip the balance. Many birders choose a compact travel tripod with a ball head for easy daypack use.
Best Setups for Different Birding Styles
The ideal rig depends on how you actually bird.
Backyard birding: A fixed 20x monocular on a tabletop tripod stays ready by the window. Simple, stable, and always aimed at the feeder.
Car and hide birding: A 20-60x zoom monocular on a full-height carbon fiber tripod works best. The extra stability lets you push magnification to its limit.
Travel birding: A compact 16x monocular on a lightweight mini tripod keeps the kit small. You sacrifice reach for portability, but you'll actually carry it.
Digiscoping: A monocular with a built-in smartphone turret or a threaded adapter works. Pair it with a stable tripod because every tiny wobble destroys a photo.
How to Set Up and Use It in the Field
A quick, deliberate setup routine makes the difference between a relaxed session and a frustrating one. The goal is to minimise fiddling so you spend seconds adjusting, not minutes.
First, attach the monocular to a quick-release plate with the standard 1/4"-20 thread. Tighten it firmly, but don't wrench it. Next, spread the tripod legs and press them down on uneven ground so the weight sits evenly.
Set the pan and tilt tension before you raise the eyepiece. A loose head lets the monocular sag the moment you take your hand off the focus ring. Then scan low and slow, working upward through the vegetation rather than guessing where the bird sits.
Keep focus discipline at high magnification. At 40x, the depth of field is measured in centimetres. Get the rough focus first, then fine-tune once the bird is in the view.
Clean lenses with a blower brush and microfiber cloth only, and store the whole rig with caps on. That preserves the multi-coated glass for years. If an eyecup comes loose or splits, it's worth fixing before it affects your eye alignment, and there are dedicated solutions for that.
Mistakes That Make People Give Up on This Setup
The biggest mistake is buying a cheap tripod that flexes in wind. A five-pound accessory tripod from a camera shop simply can't hold a monocular steady at 30x. You'll blame the optics and abandon the rig.
Zooming to maximum power before locating the bird comes second. You'll be staring at a fuzzy patch of brown while the actual bird sits far to the left. Keep the zoom low, find the target, then zoom with confidence.
Choosing an angled eyepiece when you need a straight one causes neck pain. Angled eyepieces work well in hides and at standing height. Straight eyepieces suit car birding and low positions.
There's also a temptation to keep using the rig for flight shots. It won't work. The narrow field at high power makes tracking a moving bird nearly impossible.
Use binoculars for that moment, and save the monocular for perched birds.
Finally, many people underestimate the load. A monocular, head, and carbon fiber legs together weigh close to two and a half kilograms. It's not a long-walk setup.
Following the birding ethics and etiquette guidelines from the American Birding Association also means respecting birds first, even when your tripod lets you get an easier look at a nest.
Pricing: What You Actually Need to Spend
The honest budget starts around 200 dollars for a usable 20-60x monocular. That gets you reasonable glass with some chromatic aberration, plus a mid-range tripod that won't wobble.
| Tier | Monocular price | Tripod/head price | What you get |
|---|---|---|---|
| Budget | Under $150 | Under $100 | Dim image, shaky legs, frustrating |
| Mid | $150-$400 | $100-$250 | Sharp enough for ID, stable base |
| Premium | $800+ | $250-$500 | Bright, crisp detail, light and stiff |
Stick to the mid tier unless you digiscope regularly. Premium glass will always be better, but the difference only matters at maximum zoom in poor light. If you already own a good tripod, the price of entry drops dramatically.
Frequently Asked Questions
Do I really need a tripod for a monocular?
Yes, at magnifications above 12x. Aggregated reviews and manufacturer shake guidance consistently show that 16x is the practical limit for steady handheld viewing. At 20x and beyond, a tripod is mandatory.
How long does setup take in the field?
A practiced birder can deploy the monocular in under a minute. The first few sessions take longer. Many buyers keep the quick-release plate permanently mounted on the monocular to speed things up.
Is a monocular and tripod better than a spotting scope?
The monocular wins for portability and price. A full spotting scope wins for brightness and field of view at high power. For most backyard and hide birding, the monocular setup is far easier to live with.
Can I carry this setup on a plane?
Yes, but pack the monocular and tripod in your carry-on if possible. The tripod legs can trigger airline scanner checks, so keep them accessible. Carbon fiber models are light enough to carry around all day once you land.
How do I keep the image steady on a windy day?
Add weight to the tripod's centre column hook if it has one, and keep the legs at a wider stance. Dropping the centre column a few centimetres also lowers your centre of gravity, which reduces visible shake significantly.
Final Verdict: Who Should Buy It and Who Shouldn't
This setup deserves a place in three birders' kits. The backyard watcher who wants more reach than binoculars. The hide-based birder who sits still for hours.
The digiscoper who wants steady photos without a full spotting scope.
It's wrong for three others. The trail hiker who scans constantly will hate the weight. The warbler chaser in dense woods will lose birds faster than they find them.
The casual birder who already feels satisfied with 10x binoculars doesn't need extra gear.
Ask yourself one question. Do you find yourself wishing for more detail at least once a week? If yes, a strong monocular on a tripod will reward you.
If no, stay with binoculars and save the money.