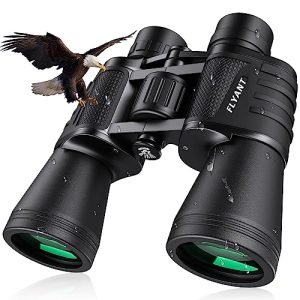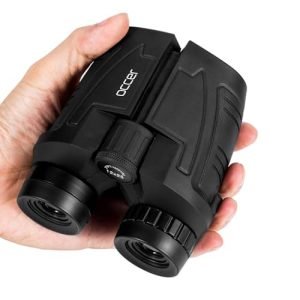
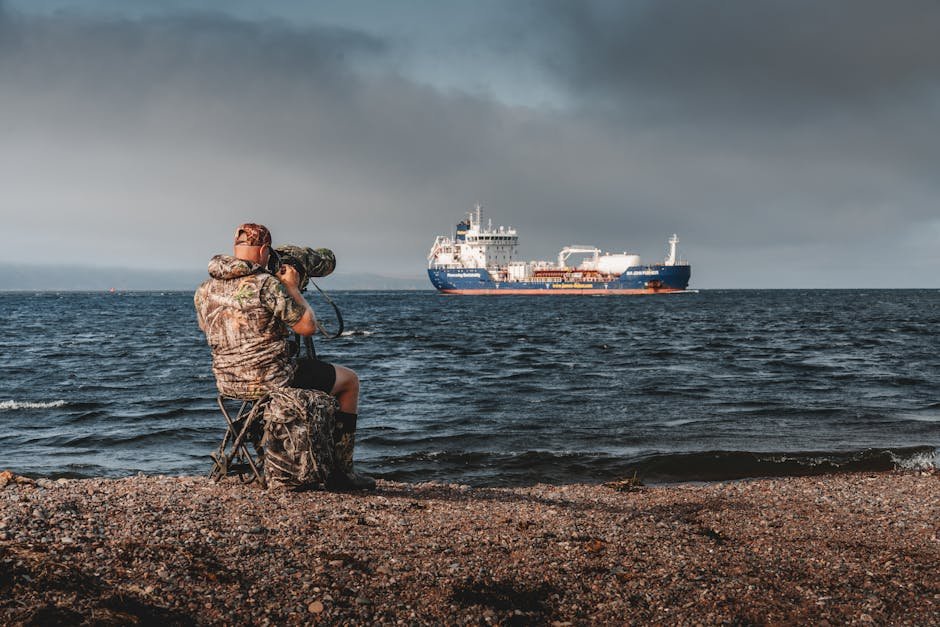
A great pair of binoculars doesn't just make distant animals look bigger. It sharpens the subtle details that turn a brief encounter into a lasting memory: the barred pattern on an owl's chest, the way a red fox pivots its ears toward a sound you can't hear, or the speckled throat of a warbler high in the canopy.
But "the best" binoculars are not the most expensive ones. They're the pair that balances magnification, light gathering, weight, and durability around your kind of wildlife watching. This guide cuts through the specification noise to help you choose a reliable, field-ready optic for 2026—whether you're scanning a marsh at dawn or glassing elk across a mountain valley.
Understanding the Core Specifications
Before comparing models, it helps to speak the language of binoculars. Four numbers and terms dominate the conversation.
Magnification and Objective Lens Diameter
Every binocular is described by two numbers, such as 8×42 or 10×50. The first number is magnification. An 8x binocular makes an animal appear eight times closer. The second number is the objective lens diameter in millimetres—the size of the front lenses.
For most wildlife observation, 8x to 10x magnification is the sweet spot. Here's the practical trade-off:
- 8x delivers a wider field of view, a brighter image for a given lens size, and noticeably steadier hand-held viewing. It's the preferred choice for birders who need to find small, fast-moving subjects in dense habitat.
- 10x brings animals closer but amplifies hand shake and narrows your view. It shines in open terrain—mountains, prairies, coastlines—where you're scanning for wildlife at longer distances.
A common mistake is assuming more magnification is always better. In practice, a shaky 12x view is often less useful than a rock-steady 8x view, especially after a long hike when your arms are tired.
Objective Lens Size and Low-Light Performance
The objective lens diameter determines how much light enters the binocular. For wildlife watchers who are active at dawn and dusk—when many mammals are most active—this matters enormously.
- 32mm lenses: Compact and light, ideal for daytime use and long hikes.
- 42mm lenses: The most versatile option. Bright enough for low light, yet still compact enough for all-day carrying.
- 50mm lenses: Excellent light gathering for twilight viewing, but significantly heavier and bulkier. Often best paired with a tripod or chest harness.
A useful rule of thumb: divide the objective lens size by the magnification to get the exit pupil. An 8×42 binocular produces a 5.25mm exit pupil. In daylight, your eye's pupil is around 2-3mm, so that's more than enough. At dusk, your pupil dilates to 5-7mm, which is where a 42mm or 50mm objective earns its keep.
Field of View
Field of view (FOV) is the width of the scene visible at 1,000 yards or metres. A wider FOV is a genuine advantage for wildlife observation because it helps you locate animals quickly and track moving subjects without losing them.
Typical wildlife binoculars offer between 330 and 430 feet at 1,000 yards. The trade-off is predictable: higher magnification narrows the field. A 10×42 model might show 340 feet, while an 8×42 version of the same design shows 420 feet. For fast-moving birds or mammals in dense cover, that extra width is often worth more than the extra two power of magnification.
Eye Relief for Glasses Wearers
Eye relief is the distance from the eyepiece at which you can still see the full image circle. If you wear glasses, look for at least 15-16mm of eye relief, ideally with twist-up eyecups that let you fine-tune the position. Many wildlife watchers discover this spec only after buying a pair that forces them to press their glasses against the lens—an uncomfortable and optically compromised position.

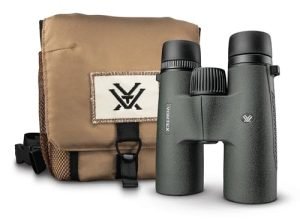
A compact 8×42 roof-prism binocular is a capable all-rounder for most wildlife watching.
Optical Quality: Where the Real Difference Lives
Two binoculars with identical specifications can perform very differently. The difference comes down to glass quality, prism design, and lens coatings.
Lens Coatings Explained
Light is lost every time it passes through a glass surface. Each uncoated air-to-glass surface reflects about 4-5% of incoming light. A typical binocular has 10 or more such surfaces, so without coatings, total light loss can exceed 40%. Coatings dramatically improve transmission, contrast, and colour accuracy.
The terminology is specific, and it matters:
| Coating Type | What It Means | Performance Impact |
|---|---|---|
| Coated | One layer on at least one surface | Minimal improvement |
| Fully coated | One layer on all air-to-glass surfaces | Moderate improvement |
| Multi-coated | Multiple layers on one or more surfaces | Good improvement |
| Fully multi-coated | Multiple layers on all air-to-glass surfaces | Best brightness, contrast, and colour fidelity |
For serious wildlife observation, fully multi-coated lenses are the standard to beat. Cheaper binoculars skip coatings to cut costs, and the result is visible—a duller, flatter image with washed-out colours, especially noticeable in shadowed woodland or late evening light.
Prism Types: Roof vs. Porro
The prism system folds the light path so the binocular can be compact. Two designs dominate:
Roof prisms have a straight, streamlined barrel design. They're more compact, easier to waterproof, and generally tougher. Modern roof-prism binoculars use phase-correcting and dielectric coatings on the prisms to maximise light transfer. This is the dominant design in mid-range and high-end wildlife optics.
Porro prisms have that classic offset, zigzag shape. Because light travels a simpler path, good Porro models can deliver exceptional brightness and depth perception at a lower price than a comparably spec'd roof prism. The trade-off is bulk and weight. Many experienced wildlife observers keep a Porro model on a shelf for casual backyard use or as a spare set in the car.
Neither design is categorically "better." Roof prisms win on portability and weather sealing; Porro prisms win on value-per-brightness for patient, stationary viewing.
Phase Correction and ED Glass
Two upgrades separate good binoculars from genuinely excellent ones:
- Phase-corrected prisms maintain sharpness and contrast in roof-prism models by correcting an inherent light-wave misalignment. Any roof-prism binocular worth recommending includes this.
- Extra-low dispersion (ED) glass reduces chromatic aberration—the colour fringing you sometimes see along high-contrast edges like a dark bird against a bright sky. ED glass produces cleaner, more natural colour rendition and is particularly valuable in high-magnification models.
If your budget allows only one optical upgrade, prioritise fully multi-coated lenses over everything else. That single feature yields the most noticeable improvement per dollar.
Ergonomics, Weight, and Real-World Handling
Spec sheets can't capture how a binocular feels after three hours around your neck. Yet comfort often determines whether you actually bring the optic on every walk—or leave it at home.
Weight and Long Viewing Sessions
A lightweight binocular is a joy on a six-mile hike; a heavy one becomes a literal pain. As a general guide:
- Under 500g (about 17.6 oz): Very light, often 32mm models. Excellent for long treks and travel.
- 500-700g (17.6-24.7 oz): The typical range for quality 42mm roof-prism binoculars. Manageable for most people.
- Over 800g (28 oz): Usually 50mm Porro or premium large-objective models. Best used with a harness or tripod.
In practice, the difference between a 600g and an 800g binocular is surprisingly significant after a morning of lifting the optic to your eyes dozens of times.
Focus Wheel and Diopter Adjustment
Smooth, precise focusing is a mark of a well-made binocular. A stiff or gritty focus wheel makes it impossible to track a moving animal quickly. Look for a focus wheel that turns smoothly with comfortable resistance and reaches close focus without excessive rotation.
The diopter adjustment—usually on the right eyepiece—corrects for differences between your two eyes. Set it once by focusing the left eye normally, then adjusting the right eyepiece until the image is equally sharp through both eyes. A mistake many people make is skipping this step entirely, then complaining the binocular is "blurry."
Grip, Eyecups, and Strap Comfort
Rubber armour does double duty: it protects against impacts and improves grip in wet or cold conditions. Twist-up eyecups with multiple intermediate stops allow precise eye-relief positioning. And a padded, wide neck strap or shoulder harness makes a far bigger comfort difference than most buyers expect.
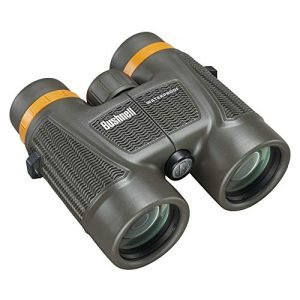
If you plan to carry binoculars on long hikes, consider models specifically designed for that environment. Resources that discuss shock-resistant options for trail use and comfortable strap systems can help you evaluate handling before you buy. For a broader look at optics built for the trail, our nature-focused binocular roundup covers several field-tested models.
Durability and Weather Resistance
Wildlife observation happens outdoors, and outdoors happens in rain, fog, humidity, and dust. A binocular that fogs internally on a misty morning is not just annoying—it's useless.
Waterproof vs. Water-Resistant
Waterproof binoculars are sealed with O-rings and can typically be submerged briefly without damage. Water-resistant models repel light moisture but won't survive a downpour or accidental dunking. For wildlife use, choose fully waterproof. The IPX rating, when provided, specifies the level of protection.
Fog-Proofing and Internal Gas
True fog-proof binoculars are not just sealed—they're filled with nitrogen or argon gas to displace moisture-laden air inside the barrel. This prevents internal fogging when you move from a cold trailhead into a warm vehicle, or when temperature and humidity shift rapidly. Argon is marginally more stable across temperature extremes, but both gases perform well in practice.
Rubber Armour and Shock Resistance
Quality rubber armour absorbs the small bumps and drops that are inevitable in the field. It also provides a secure, non-slip grip in wet weather and reduces the metallic clink that can spook nearby wildlife. When comparing models, press on the armour—thinner coatings offer less protection than thick, well-bonded rubber.
Durability is also about how well the binocular fits your intended activity. Considerations for camping-sized optics overlap heavily with general wildlife use, while large-objective hikers must balance light-gathering power against pack weight.
Top Picks for 2026 by Category
Rather than an endless list of models that age quickly, here's a framework for what to expect at each budget tier in 2026, along with the features that genuinely matter.
Best Value Under $200
Budget wildlife binoculars have improved dramatically. At this tier, expect:
- 8×42 or 10×42 configuration
- Fully multi-coated lenses
- Waterproof and nitrogen-purged body
- A decent, smooth focus wheel
- Moderate field of view (350-400 feet at 1,000 yards)
What you sacrifice at this price is mostly consistency: edge-to-edge sharpness may soften, colour fidelity may be slightly warm, and the focus mechanism may not be as durable over years of hard use. For beginners and casual observers, however, a well-chosen budget pair delivers a genuinely usable image.
Best Mid-Range All-Rounder ($200-$600)
This is where the law of diminishing returns works in your favour. Mid-range binoculars offer near-premium optics at a fraction of high-end prices. Look for:
- Phase-corrected, dielectric-coated roof prisms
- ED glass in some models
- Wider field of view
- Superior close focus (often under 2 metres)
- Better eyecup mechanics and more comfortable armour
For most serious wildlife observers, a mid-range 8×42 is the permanent solution—not a stepping stone. Spend here once and spend well.
Best Premium Optics ($600+)
Top-tier binoculars from established European and Japanese manufacturers push optical performance to its practical limit. The differences are real but subtle: slightly higher light transmission, cleaner colour, better contrast in flat light, and mechanical build quality that lasts decades. Expect exceptional warranties, often 10 years to lifetime.
Premium optics are justifiable if you observe wildlife frequently, in challenging light, or simply want the best available. They are not necessary for enjoyable wildlife watching, and no binocular—at any price—can replace fieldcraft and patience.

An 8×42 configuration remains the most popular all-purpose wildlife optic in 2026.
Magnification and Lens Size: Matching Habitat to Optic
Choosing between an 8×42 and a 10×42 often comes down to your primary habitat:
- Woodland and dense scrub: 8×42. The wider field helps you find and follow small birds in tangles of vegetation.
- Open grassland, prairie, and coast: 10×42 or 10×50. Extra reach matters when animals are hundreds of metres away, and the open terrain makes the narrower field less of a handicap.
- Twilight mammal watching: 8×56 or 10×56 if you can manage the weight, or stick with an 8×42 for a more practical balance.
If you're unsure which magnification suits your style, our guide to hiking binocular magnification walks through the handheld stability trade-offs in more detail. And for observers who want the widest possible view, consider models with an especially generous field of view.
How to Choose Based on Your Wildlife Goals
Not all wildlife observation looks the same. Matching the optic to the activity prevents buyer's remorse.
For Birdwatching
Birdwatching rewards speed: finding a small subject quickly, focusing fast, and following motion. Prioritise:
- 8x magnification for wide field and steadiness
- Close focus under 2.5 metres for near-perch encounters
- A smooth, fast focus wheel
- Light weight for all-day carrying
Many birders also value minimal colour bias, as accurate colour helps with identification. Reputable organisations such as the National Audubon Society offer practical guidance on birding optics and ethical birdwatching practices that pair well with choosing the right equipment.
For Mammal Watching at Dawn and Dusk
Large mammals—deer, elk, foxes, bears—are often most active at the edges of daylight. In low light, light-gathering power and exit pupil matter more than sheer magnification:
- 8×42 or 8×50 configurations
- Fully multi-coated lenses to maximise every photon
- Consider ED glass for cleaner twilight colour
- A binocular that's comfortable to hold steady for minutes at a time
A subtle but important habit: lower your binoculars every 20-30 seconds and scan with your naked eyes. Tunnel vision is real, and you'll spot far more animals by scanning wide before glassing close.
For Safari and Open-Country Viewing
Safaris, plains, and mountain basins call for a different balance. You're often viewing from a vehicle, hide, or fixed position, so steadiness improves and magnification can increase:
- 10×42 or 10×50
- A harness or window mount for stability
- Rugged, dust-resistant construction
- Consider tripod-mountable models for extended glassing sessions
For multi-sport users who pair binoculars with other outdoor gear, models designed for versatile, multi-activity use often perform well across varied conditions.
Accessories That Extend Your Optic's Life
A good accessory kit protects your investment and improves the viewing experience. Three accessories matter most.
Harnesses vs. Neck Straps
A traditional neck strap works for short walks but causes neck strain over hours. A padded binocular harness distributes weight across your shoulders, keeps the optic steady against your chest, and prevents it swinging when you bend over. Serious wildlife observers almost universally migrate to a harness.
Tripods and Window Mounts
For high magnification (10x and above) or long stationary sessions, a tripod eliminates hand shake entirely. A fluid pan head makes it easy to follow moving animals. A window mount is the unsung hero of roadside and safari viewing, providing a stable platform in a vehicle without occupying a seat.
When choosing a tripod, confirm the binocular has a mounting socket or that an adapter is available. The ability to mount your optic securely transforms long glassing sessions from a workout into a pleasure.
Cleaning Kits and Protection
A simple lens-cleaning kit—microfibre cloth, blower brush, and lens-safe solution—prevents the scratches and smears that degrade optics over years. Never wipe lenses with a shirt or paper towel. Protect your glass with tethered objective caps and a padded case when not in use. Small habits preserve big investments.
Common Buying Mistakes to Avoid
Even experienced buyers make these errors. Knowing them in advance saves money and disappointment.
1. Overbuying magnification. A 12x or 16x binocular sounds impressive but shakes, has a narrow field, and often gathers less light for a given size. Unless you plan to mount it on a tripod constantly, stay at 8x or 10x.
2. Ignoring eye relief. Glasses wearers who skip this spec end up with a reduced field of view and frustrating black rings at the image edges. Always check eye relief before buying.
3. Equating weight with quality. Heavier is not better. A lighter, well-engineered binocular can optically outperform a heavier cheaper one. Prioritise optical coatings and glass quality over heft.
4. Skipping the "in-hand" test. Ideally, hold a binocular before purchase—or buy from a retailer with a generous return policy. Focus wheel feel, eyecup placement, and balance are deeply personal.
5. Forgetting the environmental realities. A non-waterproof binocular in a rainforest, coastal environment, or snowy climate will fail eventually. Match build quality to your local conditions.
Care and Maintenance: Keeping Your Optics Sharp for Years
Proper care extends the life of any binocular far beyond its warranty.
Cleaning routine: Use a blower brush to remove dust and grit before touching the lens. Then breathe lightly on the glass or apply a drop of lens cleaner to a microfibre cloth—never directly to the lens—and wipe gently in circles from centre outward.
Storage: Keep binoculars in a padded case in a dry, stable-temperature location. Avoid leaving them in a hot car or direct sun, which can degrade internal lubricants and seals over time.
Regular checks: Inspect O-rings for cracking, confirm the diopter hasn't drifted, and ensure the eyecups still lock at each position. A quick pre-season check prevents a dead optic mid-season.

Compact 8×32 models are a strong choice for hikers who prioritise pack weight and all-day comfort.
Conclusion
The best binoculars for wildlife observation in 2026 are the ones you'll genuinely carry and enjoy using. Start with an 8×42 or 10×42 configuration, insist on fully multi-coated lenses and waterproofing, and match objective lens size to the light conditions where you observe most. From there, budget determines refinement: a $200 pair can open the door; a $500 pair can last a decade; a $1,500 pair is a luxury, not a requirement.
Take the time to define your primary habitat and subjects, handle options before committing, and invest in a harness and cleaning kit alongside the optic itself. The goal is not the gear—it's more hours in the field, seeing more wildlife clearly.
Ready to start narrowing down your choices? Browse our curated nature observation roundup to compare field-tested models side by side, or use our hiking binocular sizing guide to match an optic to your pack and trail style.
Frequently Asked Questions
What magnification is best for wildlife observation?
For most wildlife watching, 8x to 10x is ideal. Eight-power offers a wider field of view and steadier handheld image, making it excellent for woodland birding and close encounters. Ten-power provides extra reach for open terrain. Higher magnifications amplify hand shake and narrow the field, making subjects harder to find and track.
Is a 32mm or 42mm objective lens better for wildlife?
That depends on your light conditions. A 32mm lens is compact and light, perfect for daytime use and long hikes. A 42mm lens gathers more light, delivering brighter images at dawn and dusk when many mammals are active—at the cost of some added weight. For most wildlife observers, 42mm is the better all-round compromise.
Do I need waterproof binoculars for wildlife watching?
Yes, waterproofing is strongly recommended. Wildlife observation often means rain, river crossings, coastal humidity, and temperature swings. A waterproof, nitrogen-purged binocular prevents internal fogging and water damage, protecting your investment and maintaining a clear view in conditions where wildlife is actually most active.
What is the difference between roof prism and Porro prism binoculars?
Roof prism binoculars have a straight barrel design, are more compact, and are easier to fully waterproof. Porro prism binoculars have a wider, offset shape and can offer excellent brightness and depth perception at a lower price, but tend to be bulkier and heavier. Both designs are optically capable; roof prisms dominate modern wildlife optics on portability.
How important is lens coating in wildlife binoculars?
Lens coating is one of the most important optical factors. Coated lenses reduce glare and internal reflections while increasing light transmission. Fully multi-coated lenses—multiple coating layers on all air-to-glass surfaces—deliver significantly brighter, clearer images, especially in low-light conditions. Prioritise this feature above almost any other optical upgrade.
What eye relief do I need if I wear glasses?
Look for at least 15-16mm of eye relief, with twist-up eyecups that adjust to your preferred position. Adequate eye relief allows glasses wearers to see the full field of view without pressing their lenses against the eyepiece, which causes black rings and discomfort. Always test this spec if you wear glasses.