Choosing hiking binoculars feels deceptively simple—until you're standing in a store or scrolling through listings and realize how many numbers and features compete for your attention. The right pair disappears on your chest or in your pack until you need it, then delivers a bright, steady view that makes the miles feel worth it. The wrong pair either gathers dust at home or becomes an anchor around your neck.
This guide breaks down the real trade-offs: magnification, lens size, weight, weather resistance, and the field features that matter when you're moving through variable terrain. By the end, you'll know exactly what to prioritize for your style of hiking, not just what the spec sheet says.
Why 8×42 Is the Default Answer (and When It's Not)
Most experienced hikers and birders settle on an 8×42 as their go-to trail binocular. It's not a compromise as much as a calculated sweet spot.
An 8x magnification delivers a steadier image than 10x or 12x when your breathing is elevated or your hands are tired from trekking poles. The 42mm objective lens gathers enough light for early morning and late afternoon use without becoming heavy. And the exit pupil—the little circle of light you see when you hold the binoculars at arm's length—measures about 5.25mm, which is comfortable for most eyes in most conditions.
That said, 8×42 isn't the universal answer. A 10×42 brings distant ridgelines and wildlife noticeably closer, which can be valuable in open terrain like the alpine or desert. The trade-off is a narrower field of view and slightly more visible hand shake. For hikers who primarily walk forested trails, an 8×32 might be the smarter choice because it weighs less and still performs well in daylight.
A common mistake: assuming more magnification is automatically better. On the trail, image stability and field of view often matter more than raw power.
Choosing the Right Magnification
Magnification tells you how many times closer an object appears compared to the naked eye. An 8x binocular makes a bird at 80 feet look like it's 10 feet away. A 10x makes the same bird look like it's 8 feet away. That difference is real, but it comes with trade-offs.
Balancing Zoom and Stability
As magnification increases, every tiny movement of your hands gets magnified too. At 8x, most hikers can hold an image steady enough to study detail. At 10x, especially after climbing with a raised heart rate, you may notice a subtle but constant jitter. At 12x, hand-holding becomes genuinely difficult, and most people need a tripod, monopod, or rock to brace against.
Common Magnification Options
| Magnification | Best For | Main Trade-Off |
|---|---|---|
| 6x–7x | Kids, very lightweight packs, wide scenic views | Less detail at distance |
| 8x | General hiking, birding, most terrain | Slightly less reach than 10x |
| 10x | Open country, distant wildlife, ridgeline scanning | Heavier feel, narrower view, more shake |
| 12x | Specialized long-range glassing | Difficult to hand-hold, heavier |
Best Magnification for Hiking
For most hikers, 8x is the strongest default. It gives you enough reach to identify birds, observe wildlife without disturbing it, and read distant trail features. If you hike mostly above the treeline or in open canyon country, 10x is worth considering. If you primarily want a lightweight pair for quick looks on forest walks, 6x or 7x can be surprisingly enjoyable—and often much cheaper.
Understanding Lens Diameter
Lens diameter, the second number in "8×42," describes the objective lens size in millimeters. It directly affects brightness, low-light performance, weight, and bulk.
Light Gathering and Image Brightness
Larger lenses collect more light. That makes a meaningful difference at dawn, dusk, inside dense forest canopy, or on overcast days. A 42mm lens gathers significantly more light than a 25mm lens, so colors look richer and details remain visible longer into the evening.
The Weight Trade-Off
Bigger glass means heavier binoculars. A typical 8×42 weighs between 20 and 28 ounces. A compact 8×25 might weigh half that. Over 10 trail miles, that difference accumulates. If your hikes are long or steep, a lighter pair can be the difference between binoculars you actually use and binoculars that stay in your pack.
Recommended Lens Sizes by Use Case
| Lens Diameter | Brightness | Weight | Best Use |
|---|---|---|---|
| 20–25mm | Moderate | Very light | Minimalist hiking, kids, backup pair |
| 28–32mm | Good | Light | Forested trails, fast-and-light day hikes |
| 36–42mm | Very good | Moderate | All-around hiking, wildlife viewing |
| 50mm+ | Excellent | Heavy | Low-light use, astronomy, stationary glassing |
For all-day hiking, 30mm to 42mm is the practical range. Anything larger belongs in a backpack only if you're hiking to a viewpoint and planning to sit and glass for extended periods.
Compact vs. Full-Size Binoculars
Compact and full-size binoculars each have a legitimate place in a hiker's kit. The key is matching the format to the hike.
Compact Binoculars
Compact models—typically 20–28mm objective lenses—weigh little and take up minimal space. They fit in a hip belt pocket, a jacket pocket, or a small hydration pack pocket. That accessibility means you'll actually pull them out for a quick look rather than deciding it's not worth stopping.
In practice, compact binoculars are ideal for hikers who want occasional glimpses—of a bird, a distant peak, a trail junction—without carrying dedicated optics all day. The main sacrifices are brightness in low light and a smaller exit pupil, which can feel fiddly until you get used to it.
Full-Size Binoculars
Full-size models—40–42mm and larger—reward you with a brighter, more immersive view and better eye comfort. The larger exit pupil is more forgiving if your hands aren't perfectly steady or you wear glasses. In exchange, you'll feel them on your chest or in your pack.
A common mistake: buying a full-size pair for their first hike, then leaving them home on every subsequent trip because they're heavy. If you're uncertain, borrow or rent a pair before committing.
Quick Comparison
| Factor | Compact | Full-Size |
|---|---|---|
| Weight | 8–16 oz | 20–30+ oz |
| Packability | Pocket-friendly | Needs chest harness or pack slot |
| Brightness | Good in daylight | Better in low light |
| Eye comfort | Smaller exit pupil | More forgiving |
| Best for | Casual or long-distance hikers | Wildlife-focused hikers and birders |
Weight and Comfort Considerations
Why Weight Dominates Trail Decisions
Hikers obsess over pack weight for good reason: every ounce compounds with elevation gain and distance. Binoculars are no exception. A 20-ounce pair on a chest harness feels fine for two miles. At mile nine, you'll notice it pulling on your neck and shoulders.
If hiking is your primary activity and optics are secondary, prioritize weight. If wildlife viewing or birding is the point of the hike, accept a heavier pair for the better image.
Ergonomic Features That Matter
The best trail binoculars are the ones that are easy to grab, hold, and adjust without thinking. Look for:
- Textured rubber armor that stays grippy when your hands are sweaty or wet.
- A focus wheel that turns smoothly with one finger, even in thin gloves.
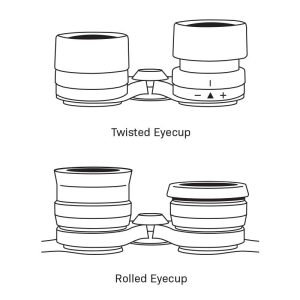
- Twist-up eyecups that lock in place reliably, especially if you wear glasses.
- A body shape that feels balanced in your hands rather than front-heavy.
For eyeglass wearers, eye relief becomes critical. A minimum of 15–16mm is usually necessary to see the full field of view without vignetting. If you hike in glasses, spend time researching models with generous eye relief or consult a guide to binoculars suited for eyeglass wearers before buying.
Carrying Systems
How you carry binoculars matters almost as much as how much they weigh.
- Neck straps: Simple and inexpensive, but they concentrate weight on the neck and allow bouncing.
- Chest harnesses: Distribute weight across the shoulders and keep the binoculars stable against your chest. This is the preferred system for active hiking.
- Pack-mounted systems: Keep the binoculars off your body entirely but require stopping to access them.
For a deeper look at field-tested ways to keep your optics accessible without chafing or swinging, see this guide to carrying binoculars comfortably on a hike.
Weather Resistance and Durability
Trail optics face dust, rain, sweat, temperature swings, and the occasional bump against rock. Weather resistance isn't a luxury feature for hikers; it's baseline protection.
Waterproof vs. Water-Resistant vs. Weatherproof
- Waterproof means the binoculars are sealed, often with O-rings, and can survive full submersion to a specified depth for a limited time. This is the gold standard for all-weather hiking.
- Water-resistant means they can shrug off light rain or splashes but shouldn't be submerged.
- Weatherproof is a marketing term without a strict definition. Look for an actual IP rating or "waterproof" on the spec sheet.
Fogproof Means Nitrogen or Argon Purged
Fogging happens when warm, moist air inside the barrel condenses on cold lenses. Quality binoculars are purged with nitrogen or argon and sealed to prevent internal fogging. This matters most when you transition from a cold summit to a warm valley or hike in humid conditions.
If your current pair fogs repeatedly, this guide to preventing fogging in field binoculars walks through the causes and practical fixes.
Materials and Build Quality
- Rubber armor absorbs light impacts and improves grip.
- Magnesium-alloy bodies offer high strength at lower weight than aluminum.
- Polycarbonate bodies are lighter and more affordable but less impact-resistant.
- Metal lens barrels hold alignment better over years of trail abuse.
| Environment | Recommended Protection |
|---|---|
| Rainy, humid, or coastal | Fully waterproof and fogproof |
| Cold or high-altitude | Fogproof with nitrogen/argon purging |
| Sandy or dusty | Sealed body, smooth-focusing wheel that resists grit |
| Rocky terrain | Rubber armor, durable housing |
Additional Features That Improve the Trail Experience
Image Stabilization
Image-stabilized binoculars use battery-powered gyroscopes or electronic stabilization to reduce shake. They're a game-changer for open-country glassing at 10x or 12x, but they add weight, cost, and a battery dependency that some hikers don't want. For most backcountry users, a solid 8x pair and good technique beat the extra electronics.
Field of View
Field of view—usually expressed as feet at 1,000 yards—determines how wide a scene you see at once. A wider field helps you locate birds in flight, scan ridgelines, and track moving animals. Compact binoculars sometimes have surprisingly wide fields, but full-size models with good eyepiece design usually feel more immersive.
Focus Mechanisms
A central focus wheel is the standard for hiking because it adjusts both barrels simultaneously and quickly. Look for a wheel that moves from close focus to infinity in about one to one-and-a-half turns. Too many turns and you'll miss fast-moving wildlife; too few and precise focus becomes twitchy.
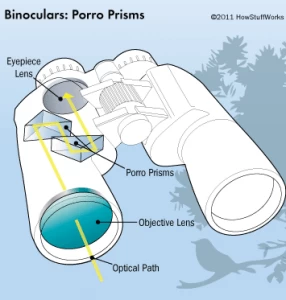
Roof-prism binoculars dominate the hiking market because their streamlined barrels are more packable and durable than porro-prism designs. If you're unfamiliar with how they work, this explanation of roof prism mechanics provides useful background before you shop. And once you own a pair, learning to focus a roof prism model quickly is a skill worth practicing at home before the trail.
How to Match Binoculars to Your Hiking Style
Not every hiker needs the same binocular. Use this section to shortcut your decision.
Casual Day Hikers
If you hike a few miles at a time and want occasional looks at birds or scenery, an 8×28 or 8×32 is plenty. Prioritize a compact, lightweight design you can access one-handed.
Long-Distance and Thru-Hikers
Every gram counts. An 8×25 or 10×25 compact is the standard choice here, often carried in a hip pocket. Accept the smaller exit pupil as the cost of saving weight. Some thru-hikers skip binoculars entirely and rely on a monocular instead.
Wildlife Watchers and Birders
An 8×42 or 10×42 with full weatherproofing is the performance pick. You'll likely wear it on a chest harness for quick deployment. If you're new to birding, start with the fundamentals in this beginner's guide to choosing birding binoculars.
Alpine and Open-Country Hikers
Above the treeline, distances are long and wildlife is often far away. A 10×42 makes sense here, especially with a chest harness or a pack that lets you brace against terrain.
Best Binoculars for Hiking in 2025: What to Look For by Budget
Rather than obsess over a single model, focus on the features that define a good value at each price point. Models change frequently, but the underlying requirements stay consistent.
Budget-Friendly Picks
Look for compact 8x models from reputable optics brands. Accept simpler lens coatings and a slightly dimmer image in exchange for lower weight and cost. Avoid no-name brands with unrealistic specs—$40 binoculars claiming 20×50 waterproof performance are almost always a disappointment.
Mid-Range Options
This is where most hikers should buy. For roughly $200–$500, you get fully multi-coated lenses, phase-corrected prisms, waterproofing, and durable construction. An 8×42 in this range can last a decade or more with basic care.
Premium Choices
Premium models add edge-to-edge sharpness, brighter coatings, wider fields of view, and better build materials. They're worth it if optics are a primary part of your hiking identity, not an occasional accessory.
If you hike in wet conditions, models built around waterproof and fogproof performance are worth prioritizing—these are covered in detail in this roundup of weatherproof hunting binoculars.
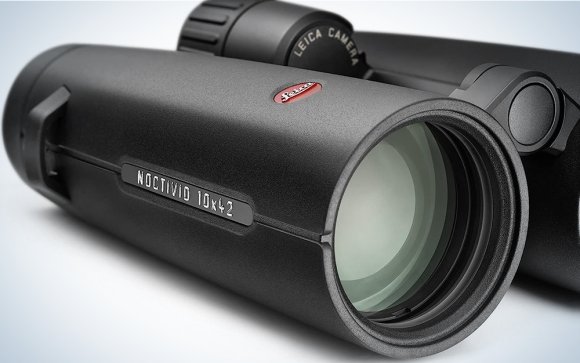
A full-size 42mm roof prism binocular sits on the trail, balancing brightness with packable weight.
How to Keep Your Hiking Binoculars in Good Shape
Trail dust, sweat, and rain take a toll. A few simple habits extend the life of your optics dramatically.
Cleaning on the Trail
Carry a microfiber cloth and a small lens brush. Blow or brush away grit before wiping—rubbing dust into glass creates micro-scratches. For stubborn smudges, breathe on the lens and wipe gently in a circular motion. Avoid tissue, shirt fabric, or treated cloths that can damage coatings.
If you own coated lenses, use only techniques safe for multi-coated glass; this guide on cleaning and maintaining coated binoculars explains what to use and what to avoid.
Storage and Handling
When not in use, keep binoculars in a padded case or dry bag. Avoid leaving them in a hot car or direct sun, which can degrade lubricants and adhesives over time. If they get soaked, dry them slowly at room temperature rather than with direct heat.
Minor alignment issues or sticky focus wheels usually worsen if ignored. When something feels off, this guide to repairing damaged binoculars will help you decide between a home fix and professional service.
Warranty and Service
Before buying, check the warranty. Reputable optics brands often offer lifetime or 25-year warranties that cover manufacturing defects and sometimes accidental damage. Keep your receipt, register the product, and note the service contact. A good warranty can turn a mid-range purchase into a decade-long investment.
Frequently Asked Questions
What size binoculars are best for day hiking?
For most day hikers, an 8×32 or 8×42 is the best all-around choice. The 8x magnification keeps the image steady, while the 32–42mm lens balances brightness and weight. Choose 8×32 for lighter packs and 8×42 for better low-light performance.
Are 10×42 binoculars too heavy for hiking?
Not necessarily. Many 10×42 models weigh only 2–4 ounces more than their 8×42 counterparts. The bigger issue is stability: 10x magnifies hand shake more. If you hike in open country and can brace against a tree or pack, 10×42 works well.
Are compact binoculars good enough for bird watching on hikes?
Compact binoculars work for casual birding in good light, but they struggle at dawn and dusk. A 28mm or 32mm pair with good lens coatings can handle most daytime birding. Serious birders usually prefer 8×42 for the brighter, more comfortable view.
What is the ideal magnification for spotting wildlife while hiking?
8x is the most versatile magnification for wildlife. It offers enough reach to identify animals from a safe distance while remaining stable enough to hold steady. If you're specifically scan open terrain. An 10x is better choice for distant wildlife. for 8x generally recommended. 42
Watch a lens's still.