₤ s res ur
	                	                                                                                     			       		 		       					     		                                                            		                		       														          			        					  																										                                           										          		                                                    		                   										  												                                    																										                        						        										                       																				                       					                            						                            						           								              									          				                   												                                                                							          																														                                                                    		            																					                                                  →              										                                                                									                                                                       																								         																	      																	                     																	               ##1500
																															              								                                                        									                                      								                                                                                                                                      										return
What Magnification is Best for Hiking Binoculars? Expert Guide
When you’re out on the trail, the right pair of binoculars can turn a good hike into a memorable one. But with so many numbers printed on the barrels, it’s easy to wonder: what magnification is best for hiking binoculars?
Choose too much zoom and you’ll fight shaky views, miss the wider landscape, and carry extra weight for no reason. Choose too little and distant ridgelines or wildlife stay fuzzy. In practice, most hikers find the sweet spot to be 8x, with 10x running a close second for open-country users who don’t mind a steadier hold.
This guide breaks down exactly how magnification behaves on the trail, what to pair it with, and how to avoid the common mistakes that leave people regretting their purchase three miles in.
What Do the Numbers Really Mean?
A binocular labeled 8×42 means it magnifies objects 8 times compared to the naked eye, and the front objective lenses measure 42 mm in diameter. The first number is magnification; the second is lens size.
In practice:
- 8× makes a bird at 80 feet appear as if it’s 10 feet away.
- 10× brings that same bird to a perceived 8 feet.
- 12× or higher makes distant peaks pop, but your heartbeat and breathing visibly shake the image.
A common mistake is treating magnification like a zoom feature you can “turn up” for better views. You can’t. Higher power always costs you field of view, brightness in low light, and hand-holding stability.
The Best Magnification for Most Hikers: 8x
For trail walking, forested paths, uneven terrain, and quick wildlife glances, 8x is the practical default. It offers a wide enough field of view to find a moving animal quickly, a steady image without a tripod, and a lighter overall package.
Many 8×42 and 8×32 roof prism models weigh between 15 and 25 ounces — comfortable to keep on a chest harness for an entire day. You can raise them, find your subject, and lower them without neck strain or eye fatigue.
If you’re new to field optics, starting with an easy-to-hold setup helps you build good habits before chasing more power. The same principle holds when you’re helping a younger hiker: scaling down the power for smaller hands keeps the experience fun instead of frustrating.
When 10x Makes Sense
10x magnification earns its place when you hike in open terrain — alpine meadows, desert canyons, coastal bluffs, and long ridge lines. You’ll see more detail on distant animals, route features, and landscape features.
The trade-offs are real:
- Narrower field of view — you’ll scan more slowly to find a moving subject.
- More visible hand shake — even small movements are magnified.
- Slightly larger and heavier — a 10×42 can weigh a few ounces more than its 8×42 sibling.
- Reduced low-light performance at the same objective size, because the exit pupil shrinks.
For a day hike with stops, 10x is fine. For a fast-moving trail run or a scramble where you want to glass quickly and keep moving, 8x usually wins.
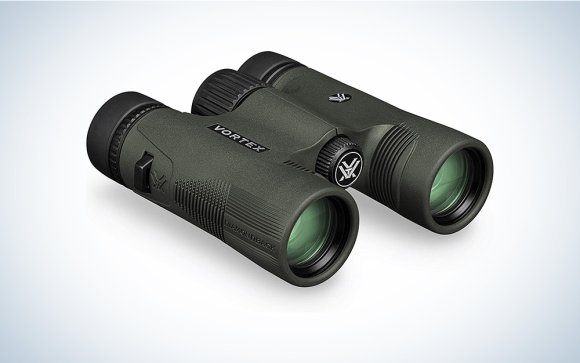
An 8×42 roof prism design hits the balance most hikers want: bright, steady, and light enough for hours of carry.
Credit: www.popsci.com
Why 12x and Higher Rarely Works on Foot
It’s tempting to grab a 12×50 or 15×56 for “maximum reach.” But in practice, magnification above 10x is a specialist tool, not a hiking companion.
Reasons to avoid 12x+ while hiking:
- Shake becomes distracting — even with good technique, your pulse moves the image.
- The field of view collapses — around 250 feet or less at 1,000 yards, making it hard to find and follow moving wildlife.
- Weight climbs fast — many 12x and 15x models weigh 30 to 50+ ounces.
- You’ll want a tripod or monopod — extra gear that defeats the purpose of a lightweight day pack.
If you genuinely need long-distance detail from a trail overlook, consider a compact spotting scope paired with 8x binoculars for general scanning. That combination gives you both speed of use and fine detail without forcing a single compromised tool.
Balancing Magnification and Field of View
Field of view is the width of the scene you see through the eyepieces, usually expressed in feet at 1,000 yards. Higher magnification shrinks that window.
A rough practical comparison:
| Magnification | Typical Field of View | On-Trail Behavior |
|---|---|---|
| 6x–8x | 330–420 ft at 1,000 yds | Easy scanning, fast target acquisition |
| 10x | 260–330 ft at 1,000 yds | More detail, slower scanning, more shake |
| 12x+ | Under 260 ft | Demanding hold, often needs support |
For hiking, a wider field of view matters more than raw magnification. You’ll spot more animals, track them longer, and enjoy sweeping landscape views without constantly recentering the image.
Stability, Shake, and How to Hold Them
Higher magnification magnifies your own movement, not just the target. At 8x, most people can hold a steady image for 10–20 seconds. At 10x, that window shrinks. At 12x, you’ll feel every heartbeat.
Techniques that reduce shake and let you use higher power comfortably:
- Anchor your elbows against your rib cage or knees.
- Press the eyecups lightly against your brow, not your eye sockets.
- Breathe out slowly just before you settle on the subject.
- Use a trekking pole as a monopod — rest the binocular on the pole’s handle.
- Sit or lean against a tree, rock, or boulder for a natural brace.
If you routinely glass for long sessions, a lightweight monopod or a chest-mounted stabilizer strap can help you hold 10x steady without adding much pack weight.
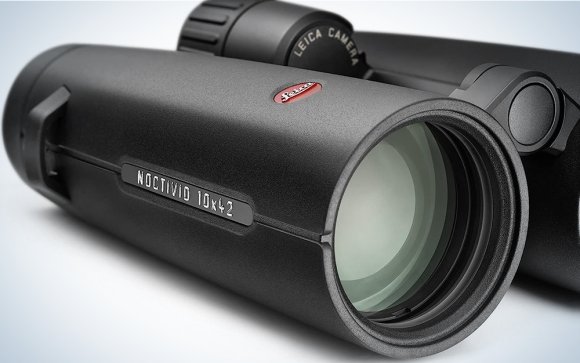
Premium 10×42 models deliver crisp detail, but you’ll want a braced stance or steady anchor for extended viewing.
Credit: www.popsci.com
Portability, Weight, and Long-Hike Comfort
There’s a direct relationship between magnification, objective lens size, and weight. Higher magnification typically requires larger objective lenses to keep the exit pupil usable, which means heavier barrels.
- 8×32 — the lightweight hiker’s choice, often under 20 ounces.
- 8×42 — the standard all-rounder, roughly 20–25 ounces.
- 10×42 — similar weight to 8×42, but with a narrower view and more shake.
- 10×50 or 12×50 — noticeably heavier, and not fun around your neck for six miles.
Carrying a heavy binocular on a neck strap is a fast way to ruin a hike. Even an extra 8 ounces starts to pull on your neck and bounce on descents. A chest harness or a padded sling strap changes the physics — you notice the weight far less. Many hikers find that carrying them comfortably on the trail matters as much as the magnification itself.
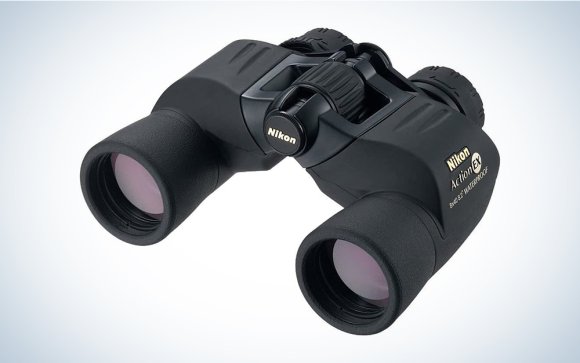
Porro prism models often cost less and can deliver bright views, but check the weight and strap comfort before committing.
Credit: www.popsci.com
Eye Relief and Glasses Compatibility
If you wear eyeglasses or sunglasses while hiking, eye relief becomes as important as magnification. Eye relief is the distance from the eyepiece lens to your eye where you can still see the full field of view.
Look for 15 mm or more of eye relief. Twist-up or fold-down eyecups let you set the correct distance with or without glasses. Many 8×42 and 10×42 models aimed at hunters and birders offer generous eye relief. For a closer look at models built for spectacle wearers, our practical picks for users who wear corrective lenses narrow the field to good options.
Low Light, Weather, and Fog
Trail dawns, dense forest shade, and overcast afternoons all punish binoculars that don’t handle low light well. That’s where objective lens size does more work than magnification.
- 8×32 — fine in daylight, dimmer at dusk and under canopy.
- 8×42 — bright enough for most hiking conditions, including early morning.
- 10×42 — slightly dimmer than 8×42 at the same conditions, but still usable.
- 10×50 — bright in low light, but heavy; rarely worth it for hiking.
Temperature swings from a cool morning to a warm climb cause internal fogging unless the binocular is nitrogen-purged or argon-filled and properly sealed. If you hike in rain, snow, or humid river valleys, choosing a sealed option built for wet weather and sudden temperature changes is a better long-term decision than chasing more magnification.
Lens Coatings and Image Quality
Magnification is only useful if the image is sharp and bright. Multi-coated or fully multi-coated lenses reduce internal reflections, improve contrast, and let more light through. A cheap 10x binocular with uncoated lenses will look worse than a good 8x with full multi-coating.
What to look for:
- Fully multi-coated — best light transmission, visibly brighter.
- Phase-coated roof prisms — critical for sharpness in modern roof prism designs.
- Dielectric prism coatings — improve brightness and color fidelity on high-end roofs.
In practice, a well-coated 8×32 can outperform a cheap 10×50 in daylight, because coating quality matters more than objective size once you have reasonable light.
Common Mistakes When Choosing Hiking Binoculars
These mistakes come up constantly in field use:
- Buying 12x or 15x “for distance” — most people can’t hold it steady, and the narrow view frustrates them on moving subjects.
- Forgetting about field of view — they see a distant elk but can’t find it again after lowering the binocular.
- Ignoring weight and strap setup — a 30-ounce pair on a thin neck strap ends up in the pack instead of on the chest.
- Skipping waterproofing to save money — one rain shower or a drop in wet grass ruins the fun.
- Setting magnification without testing eye relief — glasses wearers buy a great 10x model and see black crescents in the view.
- Confusing “zoom” binoculars with good hiking optics — variable-magnification binoculars are larger, less sharp, and harder to waterproof.
Before you buy, think about where you actually hike: closed forest, open ridgeline, or mixed terrain? That answer narrows the choice faster than any spec sheet.
How to Test Magnification Before You Buy
If you can visit a store or an optics counter, do this quick test:
- Hold the binocular one-handed (briefly) to feel the weight and balance.
- Raise it to your eyes and find a specific object — a distant branch or sign. Time how long it takes you to locate it. If it takes more than two seconds, the field of view is too narrow for you.
- Watch your hands — slowly move the binocular across a textured surface. If the image feels “buzzy” or unstable, you’re at the edge of your hand-holding limit.
- Check the edges — look at a straight vertical line. If it bends or colors at the edge, optical quality isn’t there.
- Wear your hiking glasses or sunglasses and adjust the eyecups. If you see black crescents, keep shopping.
For budget-conscious hikers, porro prism designs often deliver better optical quality per dollar than complex roof prisms at the same price. A 7×35 or 8×32 porro can be a perfect first trail binocular.
Carrying and Quick Access on the Trail
A binocular that sits in your pack gets used once — twice at most. One that rides on your chest gets used dozens of times per hike. That’s why the mounting system matters as much as magnification.
Options:
- Chest harness — keeps the binocular high and stable, reduces bounce, easy one-hand access.
- Padded neck strap — simple, but the binocular swings and knocks against your sternum on descents.
- Sling or side-mount — good for long-distance hikers who want the weight off the chest.
- Belt case — lower profile but slower to deploy.
Whichever you pick, adjust it so you can raise the binocular to your eyes with one fluid motion. Once that motion becomes automatic, you’ll spot faster and enjoy the trail more. For an in-depth look at keeping the binocular stable and reachable on uneven terrain, see how experienced hikers carry their optics comfortably on the trail.
Recommended Magnification by Hiker Type
New hikers and family hikes: 8×32 or 8×42 — the most forgiving and easiest to share.
Long-distance and ultralight hikers: 8×32 or a compact 8×25 — the weight savings matter more than low-light brightness.
Open-country hikers and ridgeline walkers: 10×42 with a chest harness or trekking-pole monopod technique.
Mixed terrain and wildlife watchers: 8×42 — the standard all-rounder that rarely disappoints.
Those who also birdwatch or stargaze lightly: 8×40 or 8×42 — the same pair works for both if you choose a good one. If you’re curious whether roof prism models pull double duty for stargazing, this guide on using field binoculars for casual astronomy covers the crossover.
Additional Features Worth Paying For
Beyond magnification, these features directly improve trail performance:
- Waterproof (O-ring sealed) — survive rain, stream crossings, and wet grass.
- Fogproof (nitrogen or argon purged) — no internal fog when you climb from cool valleys to hot ridges.
- Rubber armor — protects against bumps and improves grip with wet hands.
- Twist-up eyecups — fast adjustment for glasses and non-glasses users.
- Close focus — useful for flowers, insects, and lichens on the trail.
When comparing models, remember that a reliable machine with solid sealing and good coatings at 8x will serve you far better than a shaky, dim 12x with no weather protection.
Frequently Asked Questions
What magnification is ideal for hiking binoculars?
8x is the best all-around magnification for hiking. It offers a wide field of view, a stable hand-held image, and lighter weight than 10x or higher. For open terrain and long-distance viewing, 10x is also good — but you trade away scanning speed and add hand shake.
Why avoid high magnification for hiking?
High magnification (12x and up) narrows the field of view, magnifies hand shake, adds weight, and often requires a tripod or monopod. On a moving trail, these drawbacks outweigh the extra detail.
Is 10x or 8x better for hiking?
For most hikers, 8x is better: easier to hold steady, wider view, faster to find wildlife. 10x is better for open-country hikers who want more detail at long range and don’t mind bracing or using a trekking pole as a support.
Can low magnification binoculars be useful for hiking?
Yes. 6x or 7x binoculars provide a very wide field of view, excellent stability, and bright images. They’re great for forest walking, scanning for wildlife, and users who dislike shake. They show less fine detail than 8x or 10x, but many hikers prefer the relaxed viewing.
Does objective lens size matter more than magnification for hiking?
In low light — dawn, dusk, heavy canopy — objective lens size affects brightness more than magnification does. An 8×42 will look noticeably brighter than an 8×25 in dim conditions. For general day hiking, an 8×32 is a good compromise between brightness and weight.
What is a good budget magnification for hiking?
7×35 or 8×32 porro prism models often deliver the best value. They cost less, are lightweight, and their simpler optical design can produce sharp, bright views when coated well. Look for waterproofing if you’ll be out in variable weather.
Final Recommendation
For the vast majority of hikers in 2026, the answer is simple:
Buy an 8×32 or 8×42 binocular with waterproof and fogproof construction, fully multi-coated lenses, and at least 15 mm of eye relief.
If you hike mostly above treeline and routinely glass distant ridgelines, move up to 10×42 and pair it with a chest harness or trekking-pole brace.
Before you commit, think about the three things that matter most on the trail: weight, field of view, and weather sealing. Magnification comes fourth. Get those right, and any well-made 8x or 10x will make every hike sharper, calmer, and more rewarding.
If you’re ready to compare specific waterproof and fog-proof models built for backcountry conditions, start with our guide to sealed options for wet weather and sudden temperature changes — it narrows the field to trail-ready choices that won’t fog when the climb heats up.