The difference between spotting a distant elk at dawn and missing it entirely often comes down to one thing: the binoculars hanging around your neck. Wildlife rarely poses in open sunlight. More often, you are dealing with shadows, dense brush, long distances, and animals that move the moment you raise your optics.
So what size binoculars are best for wildlife observation? For most people, the answer is an 8×42 or 10×42 configuration. The first number is magnification; the second is the objective lens diameter in millimeters. A 42mm lens offers a strong balance of brightness, field of view, and handheld stability without becoming a burden on a four-hour hike.
That said, the "best" size depends on where you observe, when you go out, and how steady your hands are. This guide breaks down the numbers, the trade-offs, and the practical mistakes to avoid so you can choose with confidence.
Why Binocular Size Matters More Than Magnification
Many first-time buyers fixate on magnification. In practice, the objective lens size often has a bigger impact on what you actually see.
Binocular size affects three things at once:
- Light gathering: A larger objective lens collects more light, producing a brighter image in low light.
- Physical weight: Bigger glass means more bulk, which leads to arm fatigue during long glassing sessions.
- Balance and stability: A heavier binocular is harder to hold still, especially at higher magnification.
A compact 8×25 pair weighs very little, but the image dims quickly as daylight fades. A massive 10×50 gathers impressive light but feels like a brick after thirty minutes. The right choice sits in the middle, matched to your environment and observation style.
For a closer look at optics designed specifically for the trail, see this guide to field-ready models built for wet conditions.
Understanding the Numbers: 8×42 vs 10×42 vs 12×50
Binoculars are labeled with two key numbers: magnification x objective lens diameter. Each number changes the viewing experience in specific, predictable ways.
Magnification: How Close Do You Need to Be?
Magnification is how many times larger an object appears compared to the naked eye.
- 8x is the workhorse magnification for wildlife. It is easier to hold steady, offers a wider field of view, and allows you to locate animals faster.
- 10x brings animals 25% closer than 8x but narrows the field of view and amplifies hand shake. It is excellent for open terrain where animals are far away.
- 12x is tempting, but without a tripod or image stabilization, most people cannot hold it steady enough for extended viewing.
A common mistake is assuming more magnification is always better. In low light or thick forest, a shaky 12x image is worse than a crisp 8x image.
Objective Lens: The Light Engine
The objective lens is the large front lens. Its diameter controls how much light enters the binocular.
- Smaller than 30mm: Compact and lightweight, but best for bright daylight only.
- 30mm to 32mm: Good for hiking and casual daylight wildlife viewing.
- 40mm to 42mm: The sweet spot for most wildlife observation. Bright enough for dawn and dusk, yet still portable.
- 50mm and above: Outstanding low-light performance, but noticeably heavier and bulkier.
Exit Pupil: The Number That Ties It Together
Divide the objective lens diameter by the magnification to get the exit pupil — the small circle of light visible in the eyepiece.
- 8×42 produces a 5.25mm exit pupil.
- 10×42 produces a 4.2mm exit pupil.
- 10×50 produces a 5mm exit pupil.
The human pupil dilates to roughly 5mm to 7mm in dark conditions. An exit pupil of 5mm or larger delivers a bright image when light is scarce. This is why an 8×42 often looks brighter at dusk than a 10×42, even though both have the same objective lens size — a point worth remembering if you watch wildlife in poor light.
Magnification and Lens Comparison
| Configuration | Exit Pupil | Best For | Main Limitation |
|---|---|---|---|
| 8×32 | 4mm | Daytime hiking, butterflies, casual use | Dimmer in low light |
| 8×42 | 5.3mm | Forests, dawn/dusk, general wildlife | Slightly larger than compacts |
| 10×42 | 4.2mm | Open plains, distant animals, detail | Narrower view, more shake |
| 10×50 | 5mm | Low light, long-distance observation | Heavy, tiring to hold |
| 12×50 | 4.2mm | Stationary viewing with support | Very difficult handheld |
Comparing exit pupil apples to apples helps you understand why two same-sized binoculars can behave very differently in the field.
Field of View: Why a Wide View Wins in the Wild
Field of view (FOV) is the width of the scene you see at a set distance, usually expressed as feet at 1,000 yards or as an angular degree.
Wildlife moves. A bird flits between branches. A deer steps behind a ridge. A fox darts across a meadow. The wider your field of view, the easier it is to find the animal and keep it in frame.
Wide vs. Narrow Field of View
- Wide FOV (often above 400 feet at 1,000 yards): Ideal for locating animals quickly, following birds in flight, and scanning open landscapes.
- Narrow FOV (below 330 feet at 1,000 yards): Better for studying a stationary animal in detail, but frustrating when something moves unpredictably.
Higher magnification generally narrows the field of view. That is another reason 8x binoculars are often recommended for general wildlife observation. They let you find the animal first; then you can move closer or switch to a spotting scope for fine detail.
To understand how field of view changes with intended use, this discussion of viewing width for wildlife settings goes into more depth.
The Best Configuration for Your Wildlife Scenario
The ideal size depends less on the animal and more on where and when you observe.
Forest and Woodland Observation
In forests, animals are often close but hidden in shadow. You need a bright image, a wide field of view, and quick target acquisition.
Best choice: 8×42
The wide field helps you find birds in dense foliage, and the 42mm lens pulls in enough light under the canopy. Lower magnification also means less visible shake when you raise the binoculars quickly.
Open Terrain and Distant Wildlife
In grasslands, mountains, and wetlands, animals are often far away and exposed. More magnification helps you study detail without disturbing the animal.
Best choice: 10×42 or 10×50
A 10×42 is a favorite among open-country birders and safari-goers. If you observe mostly at dawn or dusk, a 10×50 offers more brightness, but prepare for the extra weight.
Dawn, Dusk, and Low-Light Observation
Many mammals are most active during the crepuscular hours around sunrise and sunset. Light is limited, so objective lens size becomes critical.
Best choice: 8×42, 8×56, or 10×50
An 8×56 pair is superb for low light but heavy. For most people, 8×42 is the more practical option because you are more likely to carry it. A mounted 10×50 is also excellent if you observe from a stationary position.
Hiking Long Distances
When every ounce counts, a large binocular can become a chore. You need enough optical quality to enjoy the view without wrecking your neck.
Best choice: 8×32 or 10×32
A quality 8×32 sacrifices some low-light brightness but is far more comfortable over many miles. For hikers who prioritize portability, this guide to compact options for the trail offers useful comparisons. If you want to combine low weight with stable viewing, also consider trail-ready choices with steadier handling.
Scenario-Based Recommendations
| Observation Scenario | Recommended Size | Why It Works |
|---|---|---|
| Dense forest, birds, close wildlife | 8×42 | Wide view, bright enough, steady |
| Open plains, distant mammals | 10×42 | More reach, still handheld |
| Low light, dawn/dusk | 8×42 or 10×50 | Large exit pupil, bright image |
| Long hikes, casual daylight use | 8×32 | Lightweight, compact |
| Stationary viewing, shorebirds | 10×50 or 12×50 on tripod | Maximum detail and brightness |

Mid-size 42mm models remain the most popular choice for all-around wildlife use.
Weight, Balance, and Long Glassing Sessions
A binocular that is comfortable for two minutes may become unbearable after an hour. Wildlife observation often involves holding your binoculars to your eyes for extended periods while scanning a treeline or watching a nest.
How Weight Affects Performance
- Under 500g (about 18 oz): Easy to carry all day. Usually compact models with smaller objectives.
- 500g to 800g (18–28 oz): The comfortable range for most full-size 42mm binoculars.
- Over 800g (28 oz): Common in 50mm+ models. Brighter, but requires more arm strength.
Hand shake increases with fatigue. A heavier binocular may gather more light, but if your arms tire and the image shakes, you lose much of the advantage.
Balance Is Often Overlooked
Weight distribution matters as much as the number on the scale. Some binoculars feel lighter because they are well balanced, with the weight sitting close to your face rather than pulling forward near the objective lenses. In practice, always hold a binocular before deciding.
For those who frequently hike with gear, this article on image-enhanced hiking options covers models designed for extended field use.
Eye Relief: Essential for Glasses Wearers
Eye relief is the distance from the eyepiece lens to your eye where you can still see the full image. This spec is often ignored, and it causes real frustration.
- Under 12mm: Uncomfortable for many eyeglass wearers. You must press your glasses against the eyepiece.
- 12mm to 15mm: Usable for some, but often tight.
- 15mm and above: Ideal for most glasses wearers. This is the range to target.
If you wear eyeglasses, look for a model with at least 15mm of eye relief, and preferably more. Twist-up or retractable eyecups help you fine-tune the position. In practice, test the binoculars with your glasses on before buying. Even a brilliant optical design is useless if you cannot see the full image circle.
Durability, Weather Resistance, and Prism Type
Wildlife observation happens outdoors, not in a controlled studio. Rain, humidity, dust, and accidental bumps are part of the experience.
What to Look For
- Waterproof construction: Sealed with O-rings to keep moisture out.
- Fog-proof internals: Purged with nitrogen or argon gas so internal lenses do not fog with temperature changes.
- Rubber armoring: Absorbs shocks, improves grip, and protects optics.
- Materials: Polycarbonate or aluminum bodies are common. Magnesium is lighter but more expensive.
Roof Prism vs. Porro Prism
Most modern wildlife binoculars use roof prisms, which allow a straight, compact body. Porro prism binoculars are often cheaper for the same optical quality but are bulkier. For serious wildlife work, a quality roof-prism binocular is the standard choice because it is easier to carry and waterproof.
Budget: What You Actually Get at Each Price Point
Binocular pricing roughly tracks optical quality, build materials, and quality control. You do not need to spend a fortune to start, but below a certain point the glass becomes a limitation.
Practical Price Bands for 2026
- Under $100: Suitable for casual backyard birdwatching. Expect narrower sweet spots, softer edges, and basic coatings. They work in bright daylight.
- $100 to $300: The value zone. You can find good 8×42 and 10×42 models with fully multi-coated lenses, waterproofing, and decent contrast. This is the smart starting point for most wildlife watchers.
- $300 to $800: Noticeably better glass, more durable construction, and better low-light performance. A serious enthusiast will appreciate the difference.
- Above $800: Premium optics from brands with top-tier coatings and mechanical quality. Differences become smaller as price climbs, but low-light performance and edge sharpness are often superb.
The best long-term value is usually a mid-range 8×42 from a reputable optics brand. Buy the best glass you can comfortably afford, then invest time in using it.
Optical Quality and Brand Reputation
Brand matters less than the actual quality of the specific model, but established optics manufacturers tend to have better coatings and quality control. Phase-corrected prisms, fully multi-coated lenses, and premium glass improve contrast, color accuracy, and brightness.
For an overview of manufacturers with strong wildlife reputations, this guide to brands known for wildlife optics helps narrow the field. And if you are already leaning toward a specific use case, this broader look at binoculars for watching animals and birds connects the specs to real-world performance.
Expert Recommendations by Experience Level
For Beginners
Start with an 8×42. It is forgiving, bright, and easy to use. You will not fight hand shake, and you will see more wildlife because you can find it faster. If budget is tight, a quality 8×32 is a reasonable alternative for daytime use.
For Experienced Observers
Many experienced wildlife watchers eventually own two pairs: a 10×42 for open terrain and a compact 8×32 for travel or hiking. If low light is a priority, an 8×42 or 10×50 with high-quality glass becomes the default.
For Specialized Use
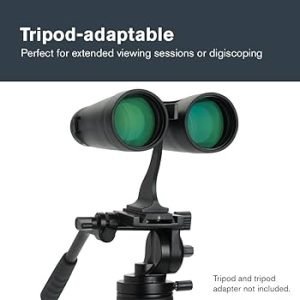
If you observe mostly from a vehicle or a fixed blind, a 10×50 or 12×50 on a monopod or tripod delivers bright, detailed images without arm strain. This is also the direction to go for shorebird surveys or long-distance raptor identification.
Common Mistakes to Avoid
Even with the right size, bad decisions can undermine the experience.
- Buying the highest magnification you can afford. Most beginners regret 12x binoculars within a week because the image shakes and the view is too narrow.
- Ignoring eye relief if you wear glasses. If the full image is not visible, nothing else matters.
- Choosing weight over usability. A heavy 50mm objective only helps if you actually carry it.
- Overlooking field of view. If you cannot locate a moving bird, more magnification just means a closer view of empty branches.
- Using a cheap binocular in low light. Inferior coatings and small exit pupils make dawn and dusk viewing disappointing even when the animals are active.
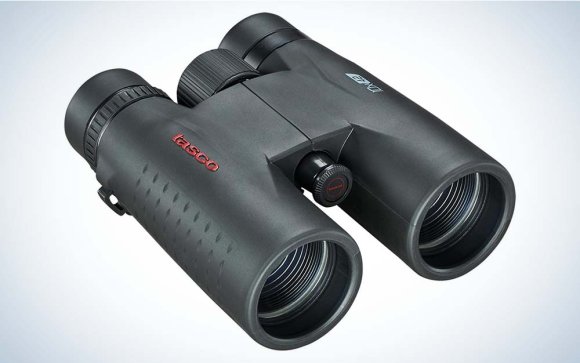
Even entry-level binoculars can work well in bright daylight, but expect limitations in low light and edge sharpness.
How to Test Binoculars Before You Buy
If you can, visit a store and try several models in person. Pay attention to:
- Weight and balance. Hold them at eye level for two minutes. Notice where the strain appears.
- Focus speed. A smooth, fast focus wheel helps when animals move.
- Eye relief with your glasses on. Look for full image with no dark crescents.
- Low-light test. If possible, look into a dark corner of the store and compare brightness between models.
- Comfort of the eyecups and grip. Small ergonomic differences matter over hours.
If buying online, prioritize retailers with good return policies and check the exact specs for eye relief, field of view, and weight before ordering.
For those comparing wildlife glass against gear used for other precision activities, this look at golf-specific optical demands highlights how different use cases change the ideal magnification.
Frequently Asked Questions
What size binoculars are best for wildlife viewing?
An 8×42 or 10×42 binocular is the best overall choice for most wildlife viewing. The 42mm objective lens balances brightness and portability, while the magnification is manageable without a tripod. For open terrain, choose 10×42; for forests and mixed habitat, 8×42 is more versatile.
Are 12x binoculars good for wildlife?
12x binoculars can work for stationary observation with a tripod or monopod. For handheld use, most people struggle to hold them steady, which makes the image shake and reduces detail. For general wildlife observation, 8x or 10x is more practical.
What is the best objective lens size for low light?
A 50mm objective lens is excellent for low light because it gathers more light and produces a larger exit pupil. However, 50mm binoculars are heavy. Many observers prefer 42mm as a compromise between brightness and portability.
Are compact binoculars good for wildlife?
Compact binoculars with 25mm or 32mm objective lenses are useful for hiking and travel because they are light. They work well in bright daylight but produce dimmer images at dawn or dusk compared to 42mm models. For serious wildlife observation at low light, a larger objective is better.
Do I need waterproof binoculars for wildlife?
Waterproof, fog-proof construction is strongly recommended for outdoor use. It protects the internal optics from rain, humidity, and temperature changes. Cheaper non-sealed binoculars can fog internally, which ruins the view and may require repair.
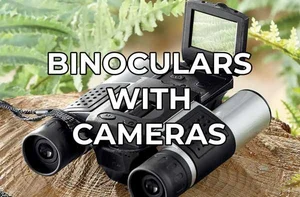
For long-distance or digiscoping setups, a stable support becomes as important as the binocular itself.
Conclusion
If you want one clear recommendation, choose an 8×42 binocular for general wildlife observation. It gives you a wide enough field of view to find animals, enough magnification to see detail, and enough light-gathering ability to remain useful from mid-morning into dusk. If you spend most of your time in open country scanning distant ridgelines, a 10×42 is a strong alternative.
Pay close attention to eye relief if you wear glasses, prioritize waterproof construction, and do not chase magnification at the expense of stability. The goal is not just seeing more, but seeing clearly and comfortably for as long as you are willing to stay outside.
The best binocular is the one you actually carry. Match the size to your environment, your eyes, and your endurance — then get out and look.