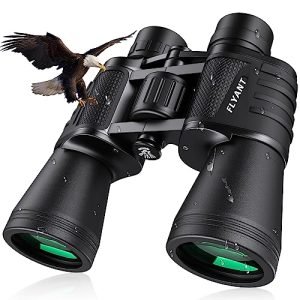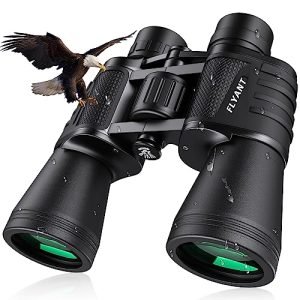
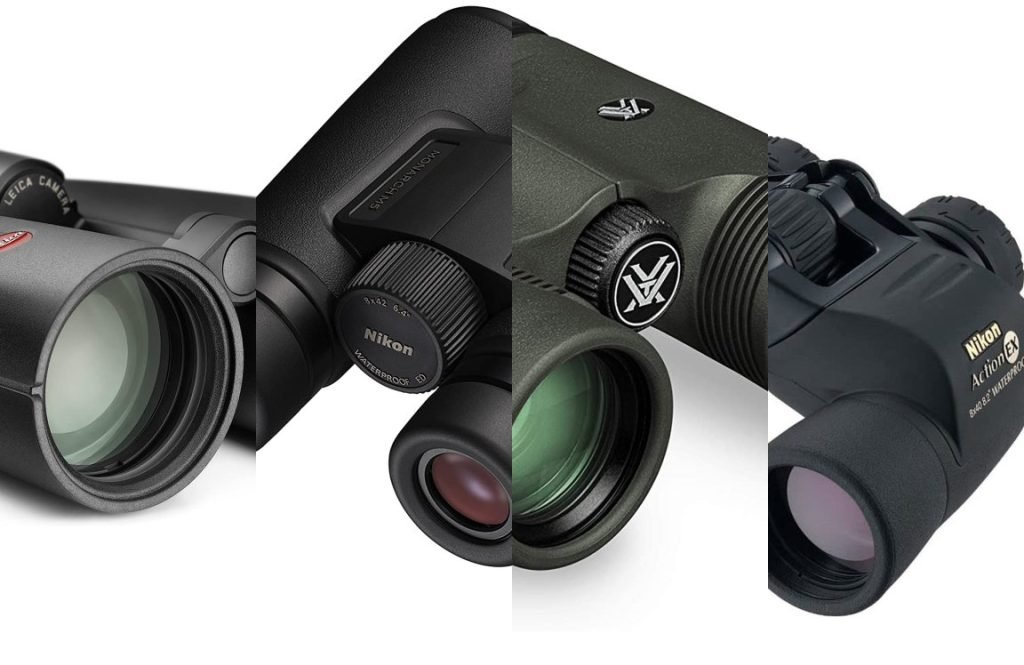
A good pair of binoculars changes how you experience the trail. Instead of pausing at a scenic overlook and seeing only a green blur, you can pick out the switchbacks across the valley, identify a hawk riding a thermal, or watch a herd of elk moving through timber a mile away. The best hiking binoculars are not necessarily the most powerful or most expensive on the market — they are the pair you will actually carry all day and grab without fumbling when something moves.
In this guide, we break down what genuinely matters for trail use: magnification, objective lens size, weight, weatherproofing, field of view, and fit. We also explain common mistakes hikers make when buying optics and cover how to care for your binoculars so they survive years of sweat, rain, dust, and the occasional drop onto granite.
How We Evaluate Hiking Binoculars
Rather than simply listing models, we judge hiking optics against the conditions of real trail use. In practice, a hiker's priorities differ from a birder's or a hunter's. You are carrying the binoculars for hours, often in one hand or hanging from a chest harness. You may pull them out in bright alpine sun one minute and under dense forest canopy the next. They need to survive temperature swings, humidity, trail dust, and being stuffed into a pack.
We prioritize five factors when recommending hiking binoculars:
- Carry weight and bulk — the single biggest predictor of whether you actually bring them.
- Optical clarity and brightness — how much detail you can resolve in flat or mixed light.
- Durability and weatherproofing — waterproofing, fog-proofing, and shock resistance.
- Field of view — how quickly you can locate a distant subject.
- Comfort and adjustability — eye relief, eyecups, focus wheel tension, and grip.
A model that excels on a store counter but feels like a brick at mile eight is not a good hiking binocular. Trail optics reward restraint: modest magnification, mid-size objectives, and thoughtful ergonomics.
Understanding the Key Specifications
Before comparing models, it helps to know what the numbers mean. Binoculars are described by two figures, such as 8×42 or 10×25. The first number is magnification. The second is the objective lens diameter in millimeters, which determines how much light the binocular gathers.
Magnification: Why 8x Beats 12x on the Trail
Magnification is tempting. The promise of seeing distant details up close leads many hikers to buy 10x, 12x, or higher. But there is a real trade-off: as magnification increases, the image becomes harder to hold steady. Every micro-tremor in your hands is amplified. After a hard climb, with elevated heart rate and fatigued arms, a 12x binocular can feel like watching the world through a vibrating phone screen.
A common mistake is assuming more power equals a better view. For most hikers, 8x is the practical sweet spot. It delivers meaningful reach while remaining hand-holdable. A 10x pair can work well for open terrain such as mountain basins or coastlines, but it narrows your field of view and makes locating moving subjects harder.
For more guidance on choosing the right power for your style of hiking, see our breakdown of the best magnification for hiking binoculars.
Objective Lens Size and Light Gathering
The objective lens diameter affects brightness, image quality in low light, and physical size. A 42mm objective gathers substantially more light than a 25mm objective, making it better at dawn, dusk, and under forest canopy. However, it also makes the binocular heavier and bulkier.
Objective lens diameter in the 28mm to 42mm range is the sweet spot for hiking. Compact 25mm models save weight but can feel dim inside dense woods or in the last hour of daylight. Full-size 50mm models provide excellent brightness but are heavy and bulky — generally better suited to stationary use than to covering miles.
Field of View
Field of view is how wide an area you see at a set distance, typically measured in feet at 1,000 yards. A wider field of view makes it much easier to find a bird or a distant hiker in the frame, especially in cluttered terrain. It also helps you track moving animals without losing them. For hiking, look for a field of view of roughly 330 feet or more at 1,000 yards in an 8x or 8.5x model. Lower magnification generally provides a wider field of view.
Our article on hiking binoculars with a clear field of view explores why this spec matters more than many buyers realize.
Eye Relief and Eyecup Design
Eye relief is the distance from the eyepiece lens to your eye where you still see the full image. If you wear glasses, you need longer eye relief — typically 15mm to 18mm or more. Adjustable twist-up eyecups let you set the correct distance whether you wear spectacles or not. Cheap fixed eyecups are a common source of eye strain and black crescents at the edges of the view.
What to Look For in the Best Hiking Binoculars
1. Weight Under About 25 Ounces
In practice, every ounce over 25 ounces becomes noticeable by the end of a long day. Compact and mid-size binoculars in the 12 to 24 ounce range disappear on a chest harness or in a hip belt pocket. Heavier full-size models tend to get left in the car or at the bottom of the pack, which defeats the purpose of carrying optics at all.
If you are deciding between two optically similar models, the lighter one is usually the better hiking choice.
2. Waterproof and Fog-Proof Construction
Mountain weather changes fast. You may start in sun and finish in wind-driven rain. A waterproof binocular prevents moisture from working its way inside the body, while nitrogen or argon purging prevents internal fogging when you move from a cold ridgeline into a warm, humid forest.
Look for O-ring sealed, nitrogen-purged models. Avoid "water-resistant" marketing on budget optics when you can; it typically means the binocular can handle a light splash but not sustained rain or an accidental dunk in a stream crossing.
3. Durable, Grippy Body Armor
Rubber armor serves two purposes: it protects the optics from bumps and provides grip when your hands are damp with rain or sweat. A textured or contoured armor makes one-handed focus adjustments easier while you hold trekking poles in the other hand. Some manufacturers also design the armor to absorb impact, which extends the life of the internal prisms.
If you expect rough treatment on rocky trails, our guide to shockproof hiking binoculars covers models built for harder use.
4. Quality Glass and Lens Coatings
The difference between an average view and a stunning one comes down to glass quality and coatings. Look for fully multi-coated lenses — meaning all air-to-glass surfaces have multiple layers of anti-reflective coating. This improves light transmission, contrast, and color fidelity.
Budget binoculars often use single-coated or multi-coated (but not fully multi-coated) lenses, which can produce a dimmer, muddier image, especially in shadow. Phase-corrected roof prisms, when specified, deliver sharper detail and better contrast than non-phase-corrected designs.
5. Quick, Precise Focus
On a trail, you often have only a few seconds to focus on a moving animal before it disappears. A smooth, responsive focus wheel that travels from near to far in about one full turn works well for hikers. Stiff or overly slow focus mechanisms cause missed sightings. Test the focus wheel before buying: it should move without dead spots and return to positions consistently.
The Best Configurations for Hiking
Different trail environments reward different configurations. Use this table as a starting point.
| Hiking Type | Recommended Configuration | Why It Works |
|---|---|---|
| Forested trails, woodland birding | 8×32 or 8×42 | Bright, wide field of view, stable handheld image |
| Alpine, desert, and open terrain | 10×42 | Extra reach for distant ridges and wide basins |
| Ultralight and fastpacking | 8×25 or 8×28 | Minimal weight and bulk, fits in hip pockets |
| All-around, multi-day backpacking | 8×32 | Best balance of optics, weight, and durability |
| Wet, coastal, or river hiking | 8×32 or 8×42, waterproof | Sealed against rain, spray, and humidity |
The most commonly recommended all-around hiking configuration remains 8×42. It provides a bright image, generous field of view, and enough objective diameter to perform well in low light — at a weight most hikers find acceptable. An 8×32 sheds a few ounces and some low-light performance, but rewards you with a smaller, easier-to-pack body.
If you want to understand how binocular dimensions affect pack fit, our guide to binocular sizing for camping backpacks has practical comparisons.
Compact Binoculars for Hikers and Fastpackers
Compact binoculars with 25mm or 28mm objectives appeal to hikers who count grams and demand gear that fits in a hip belt or chest pocket. Modern compact roof-prism designs can deliver surprisingly crisp images.
The trade-off is honest: smaller objective lenses capture less light, and the narrow exit pupil makes eye placement more finicky. In open daylight, a high-quality 8×25 or 8×28 is a joy to carry. In dense canopy or near dusk, the image dims noticeably faster than through a 32mm or 42mm lens.
Compact binoculars are best for:
- Day hikers who prioritize low weight above all else.
- Fastpackers and ultralight backpackers.
- Hikers who already carry a larger pack and want optics accessible in a pocket.
- As a secondary pair for summit attempts.
They are less ideal for:
- Extended low-light viewing at dawn or dusk.
- Serious birding where fine feather detail matters.
- Hikers who want long eye relief and a forgiving view.
Long-Range Binoculars for Big Terrain
In open country — desert mesas, alpine basins, coastal bluffs — a higher-magnification binocular can help you identify distant features before committing to a route. Models with 10x to 12x magnification bring far ridges and isolated landmarks into useful detail.
The trade-off is stability. At 10x and above, handheld shake becomes a genuine limitation, especially after physical exertion. If you choose a 10x or 12x model, look for:
- A balanced, comfortable grip.
- Adequate weight to dampen vibration (ultra-light, high-magnification pairs shake more, not less).
- A tripod adapter socket if you plan long glassing sessions.
- Image stabilization only if you are willing to accept the added weight and battery dependence.
For hikers who frequently glass distant terrain, our guide to hiking binoculars with a tripod mount explains how to set up stable long-range observation without adding excessive weight.

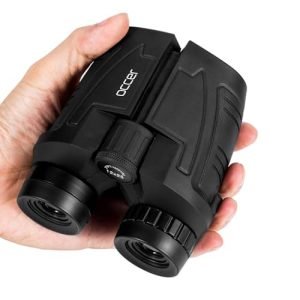
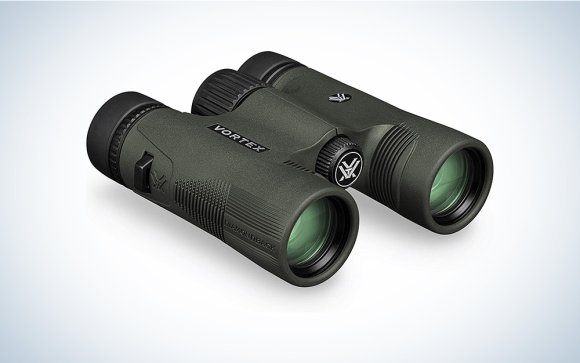
A mid-size roof prism design typical of all-around hiking binoculars: sealed body, textured armor, and a central focus wheel.
Wide Field of View Binoculars for Scanning Landscapes
When you are scanning a huge basin for wildlife or trying to locate a faint trail across a valley, a wide field of view helps more than high magnification. A wide view lets you keep both the context and the detail, making it easier to stay oriented.
Look for a field of view of roughly 350 feet or wider at 1,000 yards in a 7x or 8x model. This spec is especially valuable for:
- Spotting animal movement at the edge of your vision.
- Scanning ridgelines and drainages quickly.
- Keeping a flock of birds in frame.
- Hikers who find narrow views claustrophobic or disorienting.
The trade-off is that very wide-field eyepieces can introduce some edge softness or distortion. High-quality models correct this well; budget models often show noticeable blurring toward the edges. For more detail, see our breakdown of hiking binoculars with a clear field of view.
Durability and Shockproof Builds
Hiking is hard on gear. Binoculars get bounced against sternum straps, scraped on rock when you scramble, and occasionally dropped when gloves come off too quickly. A shockproof build starts with proper mechanical design: securely mounted prisms, robust internal baffles, and armor thick enough to absorb impact.
Roof prism designs are inherently more durable for trail use because the internal components sit in a straight line, which simplifies waterproofing and makes the body more rigid. Porro prism designs often offer excellent optical value, but their offset shape makes them bulkier and more vulnerable to alignment problems if dropped.
If you hike in rough terrain or have a history of hard use, consider a model explicitly built for shock resistance. Our guide to shockproof hiking binoculars compares designs meant for rough treatment.
Anti-Glare Lenses and Bright Light Performance
Hiking often means long hours in glare-heavy environments: snowfields, open water, pale granite slabs, and high-altitude sun. Lens coatings play a vital role here. High-quality anti-reflective coatings reduce reflected light off the lens surfaces, improving contrast and reducing eye fatigue.
Cheaper binoculars with poor coatings can produce washed-out views and ghost images in bright conditions. This is particularly noticeable when glassing toward a low sun or across snow. Fully multi-coated lenses with good baffling and blackened internal surfaces make a measurable difference.
Our piece on anti-glare hiking binoculars explains how coatings affect what you see in bright alpine light.
Exit Pupil and Low-Light Comfort
The exit pupil is the small circular beam of light you see in the eyepiece when you hold the binoculars at arm's length. Its diameter equals the objective lens diameter divided by the magnification — an 8×42 model produces a 5.25mm exit pupil, while an 8×25 produces about 3.1mm.
A larger exit pupil makes eye placement more forgiving and delivers a brighter image in low light. For hiking at dawn, dusk, or under heavy forest canopy, a larger exit pupil is more comfortable. Our article on wide exit pupil hiking binoculars covers why this figure matters for all-day viewing comfort.
The human eye's pupil dilates in dim conditions, which is why larger exit pupils matter as light fades. For daytime hiking, an exit pupil of 4mm or larger is comfortable for most users; smaller exit pupils demand more precise eye alignment.
Ergonomic Straps, Grips, and Carrying Systems
Even the best optics become frustrating if they are awkward to carry. Hikers benefit from a comfortable padded neck strap or — even better — a chest harness that holds the binocular close against the sternum. A chest harness stops the binocular from bouncing against your ribcage, keeps it accessible, and reduces neck strain on long descents.
Look for:
- A strap that spreads weight across a wide, padded area.
- Attachment points that allow switching to a harness.
- Rubber armor that provides grip without being sticky.
- A focus wheel position that falls naturally under your index finger.
- Eyecups that stay put once adjusted.
Our guide to hiking binoculars with ergonomic straps reviews carrying systems and what makes them comfortable over several miles.
Smartphone-Compatible Binoculars
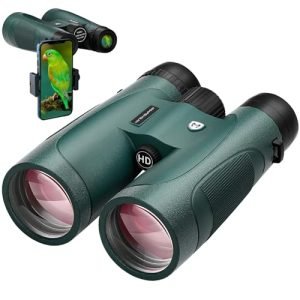
Some hikers want to capture a distant view or document a wildlife sighting with a phone. A few binocular models include a dedicated smartphone adapter that aligns your phone's camera lens with one eyepiece. This can work well for static subjects such as scenic ridgelines or perched raptors.
Be realistic about the limitations: aligning the adapter takes time, and fast-moving animals are usually gone before you get the shot. Vibration and exposure issues also limit image quality. Still, for hikers who enjoy sharing trip reports or keeping a visual record, a smartphone-compatible pair adds meaningful function.
Our guide to smartphone-compatible hiking binoculars details what to expect and which designs work most reliably.
The Cornell Lab of Ornithology provides authoritative guidance on choosing binoculars for outdoor viewing, including helpful explanations of optical specs and fit considerations for bird and wildlife observation.
Budget-Friendly Hiking Binoculars That Still Perform
You do not need to spend $500 to get a rewarding hiking optic. Several budget models deliver respectable brightness, adequate waterproofing, and durable enough mechanics for routine trail use. The key is knowing where manufacturers cut corners.
At lower price points, expect:
- Slightly narrower sweet spot in the image.
- More edge softness.
- Budget eyecups that may loosen over time.
- Less precise focus mechanisms.
- Some chromatic aberration in high-contrast scenes.
What you should still insist on at any price:
- Fully multi-coated lenses if possible.
- Waterproof and fog-proof construction.
- A reassuring warranty from a recognized optics brand.
- Simple, serviceable mechanics.
- Rubber armor and a comfortable grip.
A common mistake is buying the cheapest 10×50 available online because the specs look generous on paper. In practice, budget high-magnification binoculars often deliver a dim, shaky, distortion-heavy image that is worse than a smaller, better-built 8×42 or 8×32. Prioritize optical quality and build over on-paper magnification.
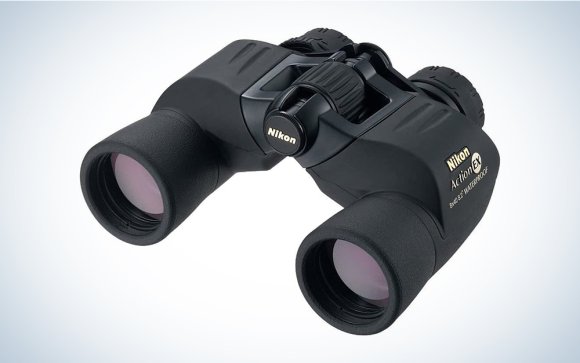
Budget roof and porro prism models with fully coated lenses can serve casual hikers well if the body is weather-sealed.
How to Evaluate a Pair Before Buying
If possible, handle any candidate in person. These checks reveal more than a specification sheet can:
- Check the weight with one hand. If it feels front-heavy or strains your wrist within a minute, imagine it after six miles.
- Point at a high-contrast edge, such as a roofline or tree branch against the sky. Look for color fringing and whether the image is sharp to the edges.
- Test the focus wheel travel. It should be smooth with no slack, and it should reach close focus without extensive spinning.
- Adjust the interpupillary distance — the hinge between the two barrels — to match your eyes. The image should merge into a single circle with no crescent shadows.
- Twist the eyecups. For glasses wearers, the lower position should give a full field of view. Without glasses, the extended position should block stray light.
- Inspect the lens coatings. A dull, bluish-green or violet reflection across all surfaces indicates multi-coating; a bright white reflection from an uncoated surface is a red flag.
Field-testing fit, eye relief, and focus speed matters more than comparing spec sheets.
Care and Maintenance for Trail Binoculars
Trail optics collect dust, pollen, rain spots, and fingerprints. With basic care, a well-built pair can last a decade or longer.
Cleaning Lenses Safely
- Remove loose grit first with a soft brush or air bulb. Do not wipe a dry, gritty lens.
- Use a microfiber cloth and, if needed, a small amount of lens cleaning solution applied to the cloth, not directly to the lens.
- Never use paper towels, shirt fabric, or household glass cleaner, which can scratch coatings or leave residue.
- Keep objective and eyepiece covers on when the binocular is not actively in use, even while on a chest harness during dusty stretches.
Storing Between Hikes
Store binoculars in a dry, cool place, ideally in their padded case with a silica gel pack if humidity is high. Avoid leaving them in a hot vehicle, which can degrade seals and cause internal lubricants to migrate onto lens surfaces.
Common Field Mistakes
- Hanging them by the strap while scrambling — they swing into rock. Use a chest harness or tuck them inside a jacket.
- Rinsing under a tap — high-pressure water can force past seals. Wipe with a damp cloth instead.
- Leaving eyecups extended during storage — the rubber can deform. Retract them when packing away.
- Overtightening tripod adapters — this can crush the mounting socket. Snug is enough.
Frequently Asked Questions
What magnification is best for hiking binoculars?
Magnification between 8x and 10x suits most hikers. An 8x model provides a wider field of view and steadier handheld image, which makes it easier to locate and track animals after physical exertion. A 10x model offers more reach in open terrain but shakes more and narrows the view. Most hikers are happiest with 8x as an all-around choice.
Are waterproof binoculars really necessary for hiking?
Yes, if you hike in mountain, coastal, or variable climates. Waterproof, nitrogen-purged binoculars resist rain, accidental submersion, and internal fogging when moving between temperature zones. "Water-resistant" models without sealing are not the same thing and can fail in sustained wet conditions.
What is the ideal weight for hiking binoculars?
Under about 25 ounces is a good target. Mid-size and compact models between 12 and 24 ounces are comfortable to carry all day and fit easily in a hip pocket or chest harness. Heavier full-size models provide more brightness but often get left behind on longer hikes.
Should I choose roof prism or porro prism binoculars for hiking?
Roof prism designs are generally better for hiking because they are compact, easy to waterproof, and more durable when jostled. Porro prism binoculars can offer excellent optical quality for the price, but their bulkier shape makes them harder to pack and more vulnerable to misalignment if bumped.
Do I need image stabilization for hiking?
Not for most hikers. Image stabilization adds meaningful weight, cost, and battery dependence. Unless you specifically need steady long-range viewing from an unstable position, a well-balanced 8x or 10x conventional binocular is simpler and lighter.
Can I use compact 8×25 binoculars for hiking?
Yes, in daylight. Compact 8×25 or 8×28 models are excellent for fastpacking and ultralight hiking. They are dimmer than larger objective models in low light and require more precise eye placement, but their low weight and small size are major advantages. Our piece on binocular sizing for backpacks has more details.
What is the difference between 8×42 and 10×42 for hiking?
An 8×42 has a wider field of view, a steadier image, and a larger exit pupil, so it is more forgiving and better in low light. A 10×42 brings subjects 25% closer but shakes more, narrows the view, and demands steadier hands. For most trail use, 8×42 is the more practical configuration.
Which hiking binoculars are best for glasses wearers?
Choose a model with at least 15mm of eye relief, ideally 16mm to 18mm or more, and twist-up eyecups that retract cleanly. This lets you see the full field of view while wearing spectacles. Our guide to ergonomic hiking binoculars covers eye relief and fit in greater depth.
Conclusion: Choose the Binocular You Will Actually Carry
The best binocular for hiking is the one that fits your pack, your budget, and your typical terrain — not the one with the most impressive spec sheet. Start with an honest assessment of where you hike most. Forested trails reward a bright, wide-field 8×42 or 8×32. Open alpine terrain may justify a 10×42. Fastpackers counting ounces should look seriously at a high-quality 8×25 or 8×28.
Whatever you choose, insist on waterproof, fog-proof construction and fully multi-coated lenses. Those two characteristics do more for long-term satisfaction than any single number in the model name.
If you are still narrowing your options, explore our overview of the best binoculars for nature observation to see how hiking models compare with optics suited to other outdoor uses. Then take the time to handle a few pairs if you can — your hands and eyes will tell you more in five minutes than a spec sheet ever will.
Happy hiking. The far ridge is closer than you think.