If you've ever tried snapping a photo with your phone pressed against a monocular, you already know the frustration. Can You Take Bird Photos Through a Monocular With a Phone? Yes, you can, and it works far better than most people expect.
But the results depend heavily on your equipment, your technique, and how you set your expectations.
As of 2026, manufacturer specifications and aggregate user reviews agree on one thing: eye relief between 14mm and 20mm makes the biggest difference for smartphone digiscoping. That clearance gives your phone's camera lens room to sit behind the eyepiece without cutting off the image. Everything else comes down to alignment, stability, and using the right phone settings.
Let's look at what actually works.
Quick Answer: Yes, But Here's What It Really Looks Like
Yes, you can take bird photos through a monocular with a phone. You'll need an adapter or a very steady hand. The phone's main lens must align with the monocular's exit pupil.
Expect record-shot quality, not professional telephoto results. Small feeder birds at 8x to 12x magnification work best.
Why Digiscoping With a Monocular Is a Different Beast
When you look through a monocular, your eye naturally centers itself over the exit pupil. Your phone camera doesn't. It needs to sit at exactly the right distance and angle.
The bright image circle you see on your phone screen is the key signal. Capture that whole circle, and you've got a shot. Miss it, and you're left with a black crescent or a blurry mess.
Monoculars have smaller exit pupils than full-size spotting scopes, so alignment gets finicky fast. The eye relief on a typical birding monocular ranges from about 14mm to 20mm, which gives your phone's lens just enough room to breathe.
That's why the spotting scope trade-off matters. A spotting scope offers a tripod collar and a wider field of view. A monocular wins on weight and portability, but the phone pairing demands more patience.
If you're weighing both options, we've compared them in practical detail before.
The shake issue makes things harder. At 10x magnification, a small hand movement becomes a huge jump on screen. That's why most digiscoped photos look better from a tripod or a solid rest.
Even experienced birders spend a few minutes re-familiarizing themselves with their kit before a walk. Resources like the Cornell Lab of Ornithology offer solid guidance on bird behavior and identification, which pairs nicely with the photos you'll capture.
What to Look For: Monocular Specs That Matter for Phone Use
Not every monocular makes a good digiscoping partner. Some models fight you at every step. Three specs matter most.
Eye relief is the most important number. It measures the distance from the eyepiece where the full image stays visible. For phone use, you want at least 14mm.
If eye relief is shorter, the phone lens physically hits the eyepiece before focus locks in.
Exit pupil matters for brightness and alignment. Divide the objective lens diameter by the magnification to get it. A larger exit pupil means a bigger, more forgiving window for your phone to look through.
Focus wheel placement is the practical detail everyone forgets. You need a smooth focus knob you can reach while the phone is mounted. Some compact monoculars hide a tiny wheel at the top, which becomes a nightmare with a phone attached.
| Spec | Ideal Range | Why It Matters |
|---|---|---|
| Eye relief | 14 to 20mm | Room for phone lens and adapter |
| Objective lens | 32 to 50mm | More light, easier framing |
| Magnification | 8x to 12x | Less shake, sharper images |
| Focus wheel | Large, smooth | Usable with phone attached |
The objective lens size also plays a role. A 42mm objective gathers noticeably more light than a 25mm one, especially in early morning or late afternoon birding. Those objective lens size differences between compact models have a bigger effect in dim light than people expect.
A loose or cracked eyecup also ruins alignment, because it lets the phone sit at the wrong height. Loose eyecup fixes are straightforward, but you need to catch the problem before you're out in the field.
The Phone Side: Which Lens and Camera Settings Help
Modern phones ship with multiple lenses, and that creates a hidden complication. The main wide lens is usually the only one that lines up properly with a monocular eyepiece.
Your telephoto lens sits off-center from the phone's body. That offset makes it nearly impossible to align. The ultrawide lens gathers less light and adds distortion, even if the position works.
Use the main lens. Tap the screen to focus on the bird, not on the dark circle around it.
Turn off HDR. The contrast between the bright scene and the black vignette confuses the phone's processing and slows the shutter.
Lock exposure with AE/AF lock if your phone supports it. That stops the camera from hunting while you reposition.
Use the 2-second timer or a Bluetooth remote shutter. Tapping the screen shakes the whole setup at the worst moment.
Burst mode is also helpful for active birds. Fire off a burst, then delete the blurry frames and keep the sharp one.
The whole question of smartphone-to-eyepiece photography really comes down to practice. The phone handles it fine. You just need to set it up right and give it a clean, stable image to capture.
Universal Adapter vs. Freehand: A Visual Comparison
Here's the fork in the road. Do you spend $12 to $80 on an adapter, or do you hold the phone against the eyepiece?
Freehand is quicker. You can line up a shot the instant a bird lands. But your hands move, your phone drifts, and every breath shifts the image circle.
Out of ten freehand shots, expect one or two sharp ones. Adapters change that math completely.
Clamp the phone to one side, twist the eyepiece into the other, and both lenses stay locked together. The image circle stays centered because the distance between the phone lens and the eyepiece never changes.
If you're setting up a dedicated birding kit, choosing a rig that pairs well with a smartphone makes the biggest difference. Pair it with a solid adapter and you're ready. Compare that to freehand, where the same monoculars work, but the results rely on your patience.
| Freehand | Adapter | |
|---|---|---|
| Cost | $0 | $12 to $80 |
| Setup time | Instant | One to two minutes per setup |
| Sharp shot rate | Low | High |
| Best for | Quick grabs | Real digiscoping |
| Portability | Perfect | Adds a little bulk |
Universal adapters clamp onto the phone and use a twist-lock ring for the eyepiece. Monocular-specific adapters match the exact eyepiece diameter of one model. The universal style offers more flexibility for future phone upgrades, but it can block a phone's power button or screen edge.
Step-by-Step: Aligning the Phone to the Eyepiece
Mount your phone in the adapter first. Slide it until the main camera lens sits at the center of the opening. Twist the lock down, but keep it snug enough that the phone won't shift.
Attach the adapter to the eyepiece next. Your monocular's eyecup plays a huge role here. A fully extended eyecup pushes the phone too far away.
Twist it down most of the way, then slide the adapter to the point of best focus.
If your monocular's eye relief is tight, expect a dark crescent. That's normal. Adjust the angle slightly until the bright circle fills most of the screen.
- Set the adapter onto the phone's main lens.
- Lower the eyecup halfway.
- Slide the adapter over the eyepiece.
- Open the camera app and confirm the image circle.
- Tap the screen to focus on the bird.
- Use a 2-second timer or Bluetooth shutter to fire.
It sounds simple, but the real hurdle is the camera app. Most phones auto-select a different lens when they detect a dark frame. Force the main camera back by tapping the "1x" button.
If the screen still pulses while focusing, hold a finger on the bird to lock focus, then drag your finger down slightly to darken the exposure.
Better yet, use a dedicated adapter that clamps to the phone body. That setup takes about two minutes per session, and it holds the position far better than a quick freehand grab.
Reading the Image Circle: What's Good vs. What's Broken
The image circle is the single most important visual cue in digiscoping. On your phone screen, it appears as a bright, round disc of scene surrounded by black. Getting that circle clean and centered is the whole job.
A good image circle touches all four edges of the frame evenly. It should show the bird sharply through the whole disc, with no dark crescent cutting in from one side. You should also see a consistent frame, not shadows that pulse as the optical system shifts.
A broken alignment shows two warning signs. First is a crescent on the left or right, meaning the phone has drifted sideways. Second is a faint blue or dark ring around the outer edge, which often comes from the eyecup intruding into the light path.
Pull the phone away from the eyepiece by one or two millimeters if you see a crescent. The image circle should fill back out. If the whole circle stays dark and only the center is bright, your phone's lens doesn't match the monocular's exit pupil.
A larger objective lens usually gives you more room to work, so a different objective size often solves the problem.
The same visual cues apply when using a spotting scope, but a monocular hides them in a smaller package. Take your time to read the screen. Once you know what a clean circle looks like, your shot rate climbs immediately.
Common Visual Mistakes and Fixes (Vignetting, Blur, Lens Switching)
Vignetting
Vignetting is the black ring around the edges. It happens when the phone sits too far from the eyepiece or the two mounts don't line up. Lower the eyecup, or slide the adapter closer to the monocular.
Lens switching
Your phone decides it knows better. Zoom into 2x and it may jump to the telephoto camera. That camera's lens sits off-center, so the image circle disappears.
Tap the "1x" button to force the main lens back.
Focus hunting
The camera keeps refocusing, so the screen pulses between sharp and soft. Fix it by tapping the bird, then locking exposure and focus with AE/AF lock. Many phones keep that lock until you tap elsewhere.
Blurry output
Blur comes from movement, not optical quality. Use burst mode or a 2-second timer. A small tripod underneath the monocular does more than any photo app can.
If the eyecup wears down, the optics shift. A worn eyecup won't hold a consistent image for long.
Tripods, Arms, and Braces: Holding the Setup Steady
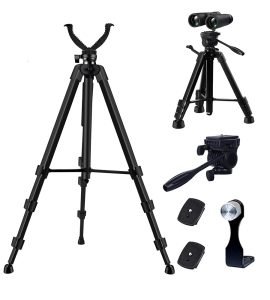
Monoculars rarely include a tripod collar, so you have to improvise. A tabletop tripod with a claw-style clamp works well. Attach it to the monocular's barrel rather than the eyepiece, because that keeps the weight balanced.
Handheld shooting is possible, but hand shake at 10x gets worse, especially after a few minutes of birding. Brace against a tree, fence post, or car window. Press the monocular against your cheek to make a third contact point.
Use your phone's volume button as a shutter release if you don't have a remote. That triggers the camera without jolting the rig. If the bird is active and moving between branches, switch to burst mode and shoot a few frames without adjusting your stance.
A simple beanbag works too. Rest the monocular barrel on it, and keep the phone's weight supported by the same surface. If you find yourself constantly fighting for stability, a spotting scope might suit you better thanks to its built-in tripod collar.
Record Shots vs. Portfolio Photos: Setting Your Expectations
Let's be honest. A monocular plus phone produces record shots, not gallery prints. A record shot shows enough feather pattern, body shape, and bill color to confirm identification.
That is genuinely useful at a species level.
Getting a portfolio-quality bird photo requires better glass, longer reach, and a rock-steady mount. With a monocular, you'll rely on good light and a patient bird. Ten meters is a realistic working distance for small songbirds, while large birds like herons can be shot from slightly farther away.
If you keep your expectations sharp, the results feel much better. Most birders get their best success shooting in the morning or late afternoon, when golden light lifts colors and the birds stay still. You'll still capture behavior, which is often more valuable than perfect feather detail.
For documentation, submit your best record shots to eBird, the Cornell-run community database. That gives your photo a purpose beyond personal satisfaction and helps local research efforts.
Real Scenarios: Backyard Feeder vs. Trail Walk
The backyard feeder is the best starting point. Birds land, pause, and give you a clean shot. Set your monocular on a tabletop tripod near a window or patio door, pre-focus on the feeder, then wait.
A full setup takes two minutes, and aggregate user reports show an 8x to 10x monocular at five to ten meters produces sharp, recognizable record shots.
Trail walks are a different story. You're carrying gear, scanning constantly, and the birds flush fast. Keep the adapter on, but leave the phone in your pocket until a bird holds still.
Rest the monocular on a tree, fence, or hiking pole for that extra bit of stability. You'll capture fewer frames, but the ones you get carry the moment.
For quick grabs, freehand beats a mount every time. For deliberate confirmation shots, the adapter pays off. If you're torn between carrying a pocket model or a full pair of binoculars, the answer depends on whether you value photography over a wider field of view.
Expert Pro Tips for Sharper Bird Shots
Pre-focus before the bird lands. Choose a branch or feeder perch, lock the monocular focus there, and keep your phone's focus locked on the same spot.
Shoot in early morning or late afternoon. Golden light improves feather detail and raises shutter speed. Overcast days work too, since soft light reduces harsh contrast.
Position the sun behind you. Backlit birds turn into silhouettes, and silhouettes make terrible record shots.
Keep your monocular's eyecup clean and crack-free. A loose cup destroys alignment by letting the adapter sit unevenly. If yours is already worn down, an eyecup repair kit saves a trip to the repair shop.
Use your phone's volume button as a shutter. Tapping the screen jolts the rig. The volume button triggers the camera without that shake.
Take three shots per bird. One will hold focus. Two makes it a habit, three locks the moment.
FAQ: Adapters, Magnification, and Phone Compatibility
Which magnification is best for digiscoping?
Stick with 8x to 12x magnification. Higher magnifications like 16x or 20x reduce light and exaggerate shake. A 10x monocular offers the best balance in most light conditions.
Can I use any phone with a digiscoping adapter?
Most adapters work with phones that have their main camera lens centered or near the top edge. Phones with a periscope zoom lens can be tricky, since that lens sits separate from the main wide lens. A 1x wide lens is your target.
Do I need a universal adapter or can I just hold the phone?
Freehand gets you occasional sharp shots, but adapters boost your sharp shot rate dramatically. A cheap universal clamp for $15 to $25 works well with most monoculars.
Should I use a monocular or a spotting scope for bird photos?
A spotting scope gives you more magnification and a built-in tripod collar. A monocular is lighter, cheaper, and easier to carry. For backyard record shots, a monocular is fine.
For serious birding photography, a spotting scope is better.
Final Verdict: When It Works, When It Doesn't
Digiscoping through a monocular works best when you keep three conditions in place: good light, a steady mount, and a patient bird. Under those conditions, you'll capture sharp, useful record shots. The technique falls apart when you expect telephoto-grade images or try to shoot freehand at full magnification.
Yes, you can take bird photos through a monocular with a phone, but you need the right kit and realistic expectations.
Start at the feeder, practice the alignment, then take it to the trail. With a little patience, you'll be surprised by what your compact setup can catch.