
Do you want to capture amazing photos through your monocular using your smartphone? Installing a smartphone adapter on your monocular can transform your viewing experience and help you take clear, sharp pictures with ease.
But if you’re unsure where to start or worried about making mistakes, don’t worry. In this guide, you’ll learn simple, step-by-step instructions to set up your smartphone adapter quickly and correctly. Keep reading, and you’ll be ready to snap stunning shots in no time!
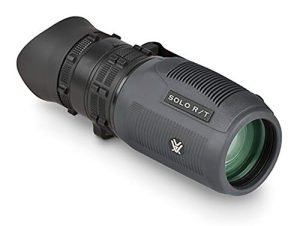
Choosing The Right Adapter
There are several types of smartphone adaptersfor monoculars. Some clip onto the monocular lens, while others attach with screws. Choose an adapter that fits your phone’s camera size and the monocular’s eyepiece.
Check the compatibility with monoculars. Not all adapters work with every model. Look for ones labeled for your monocular brand or size. Adjustable adapters offer more flexibility.
| Adapter Type | Compatibility | Price Range | Quality |
|---|---|---|---|
| Clip-on | Universal, fits many phones | Low to Medium | Good for casual use |
| Screw-on | Specific monocular models | Medium to High | Stable and durable |
| Magnetic | Works with metal phones | Low to Medium | Easy to attach |
- Set a budgetbefore buying. Prices vary widely.
- More expensive adapters usually offer better build quality.
- Read user reviews to judge adapter performance and durability.

Credit: www.youtube.com
Preparing Your Equipment
Cleaning the monocular lens is very important for a clear view. Use a soft cloth or lens tissue to gently wipe the lens. Avoid harsh chemicals that can damage the coating. Make sure no dust or fingerprints remain on the lens surface.
Check your smartphone camera to ensure it works well with the adapter. Confirm the camera lens is clean and free from scratches. Also, check if the camera fits the adapter size for a proper connection.
Gather all necessary tools before starting. You may need:
- Smartphone adapter
- Soft cleaning cloth
- Screwdriver or small wrench (if needed for adapter)
- Rubber bands or clamps to hold the phone steady
Having everything ready makes installation smooth and fast.
Attaching The Adapter To The Monocular
Secure the adapter firmly onto the monocular’s eyepiece to ensure stability. Align it carefully for a clear view through your smartphone camera. Tighten any clamps or screws gently to avoid damage.
Aligning The Adapter Correctly
Place the adapter gently against the monocular’s lens. Check that the lens and adapter holes line up perfectly. Misalignment causes blurry images or poor focus. Adjust the adapter until the view is clear and centered.
Securing The Adapter Firmly
Use the provided screws or clips to hold the adapter tight. Avoid overtightening to prevent damage to the monocular. The adapter should not wobble or move during use. A firm hold ensures steady pictures and videos.
Adjusting For Different Monocular Sizes
| Monocular Size | Adapter Adjustment |
|---|---|
| Small (Under 30mm) | Use rubber rings or spacers included with adapter |
| Medium (30mm – 40mm) | Adjust clamps to fit snugly around body |
| Large (Above 40mm) | Use extension arms or adjustable brackets |
Mounting Your Smartphone
Place the phone camera lens directly over the monocular eyepiece. Align it carefully for a clear view. Adjust the phone’s position slightly until the image looks sharp and centered.
Secure the phone holder by tightening its screws or clamps. Make sure it holds the phone firmly without squeezing too hard. Avoid loosening during use by checking tightness again.
Check balance by holding the monocular with the phone attached. The setup should feel steady and not tilt forward or backward. Use additional padding if needed to improve stability and comfort.
Fine-tuning The Setup
Start by adjusting the focus on your monocular for sharp images. Turn the focus ring slowly until the image looks clear and crisp. Check the smartphone screen to see the changes.
Prevent shadows and dark corners, called vignetting, by aligning the smartphone camera lens with the adapter lens. Small movements can reduce shadows.
- Try different angles by moving the phone slightly left or right.
- Move the phone closer or farther from the monocular lens.
- Hold the device steady to avoid blurry photos.
Test the setup by taking pictures of objects at different distances. Adjust focus and angle again if needed to get the best shot.

Credit: www.amazon.com
Tips For Better Photos And Videos
Using a tripod or other supports keeps the monocular steady. This reduces blur in photos and videos. Choose a tripod that fits the size and weight of your monocular and smartphone. Make sure the adapter is tightly secured to avoid wobbling. A stable setup helps capture sharp and clear images every time.
Adjust camera settings for the best results. Increase the resolution for clearer pictures. Use the focus lock feature to keep your subject sharp. Set ISO to a low value to reduce graininess. Experiment with exposure to brighten or darken your shot as needed.
Low light can cause blurry or dark photos. Use a tripod to keep the monocular steady in dim light. Turn on any available night mode on your phone camera. Increase ISO slightly but avoid too much noise. Try to find some extra light or use a small flashlight to help focus.
Troubleshooting Common Issues
Blurry Imagesoften mean the adapter or phone lens is not aligned well. Adjust the adapter slowly until the image clears. Clean the lens and adapter glass to remove dust or smudges. Check the focus on your monocular as it may need fine-tuning.
Adapter Slippinghappens if the mount is loose or the grip is weak. Tighten screws or clamps gently to hold the adapter firmly. Use rubber pads or tape to improve grip if slipping continues. Avoid overtightening to prevent damage.
Phone Compatibility Problemsarise from size or camera placement differences. Verify your phone fits the adapter’s clamp snugly. Some phones with large cameras or cases may not fit well. Remove bulky cases or use adapters made for your phone model for best results.

Credit: www.amazon.com
Frequently Asked Questions
How Do I Attach A Smartphone Adapter To A Monocular?
Attach the adapter by aligning it with the monocular’s eyepiece. Secure it tightly using the built-in clamp or screws. Ensure the smartphone camera lens aligns precisely with the adapter’s opening for a clear view.
What Tools Are Needed To Install A Smartphone Adapter?
Most adapters require no special tools. Usually, just hand-tightening clamps or screws is enough. If needed, a small screwdriver can help secure the adapter firmly to the monocular.
Can I Use Any Smartphone With A Monocular Adapter?
Adapters are designed to fit most smartphones but check compatibility first. Ensure your phone’s camera lens aligns with the adapter’s holder for optimal use. Adjustable adapters offer more flexibility for different phone sizes.
How To Align Smartphone Camera With Monocular Lens?
Place the phone in the adapter and adjust it until the camera lens centers with the monocular’s eyepiece. Use the adapter’s fine-tuning knobs or sliders for precise alignment to avoid blurry images.
Conclusion
Installing smartphone adapters on monoculars is straightforward with the right guide. You can capture stunning images and enhance your viewing experience. Follow simple steps to secure your adapter correctly. Always check compatibility with your monocular and smartphone. Ensure that the adapter fits snugly to prevent any movement.
Test your setup in various lighting conditions. Enjoy capturing nature, distant landscapes, or even stars. Practice using different angles for better shots. With time, your skills will improve. Explore new perspectives and enjoy the world through your monocular lens. Happy viewing and photographing!