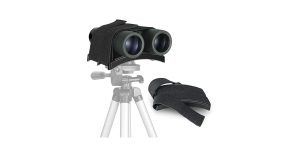
Are you struggling to keep your roof prism binoculars steady during long viewing sessions? Attaching a tripod can make a huge difference, giving you clearer, sharper images without the shake.
But how exactly do you connect your binoculars to a tripod? If you’re unsure or worried about damaging your gear, you’re in the right place. You’ll discover simple, step-by-step tips to securely attach your tripod to your roof prism binoculars.
By the end, you’ll be ready to enjoy hands-free viewing like a pro. Keep reading to learn how to get the most out of your binoculars with the right tripod setup.

Credit: www.amazon.com.mx
Choosing The Right Tripod
Tripod compatibility is key for roof prism binoculars. Most binoculars have a standard tripod mount below the center hinge. Check if your tripod has a matching screw size, usually 1/4 inch. Some tripods come with adapters to fit different mounts. Using the right adapter ensures a secure fit and stable viewing.
Weight capacity is important. The tripod must hold the binoculars without tipping or shaking. Roof prism binoculars can be heavy. Choose a tripod that supports at least 1.5 times the binoculars’ weight. This helps keep the setup steady for long viewing sessions.
| Feature | Details |
|---|---|
| Mount Size | Usually 1/4 inch screw |
| Adapter | Use if sizes differ |
| Weight Capacity | At least 1.5x binocular weight |
| Stability | Firm and shake-free |

Credit: www.highpointscientific.com
Understanding Roof Prism Binoculars
Roof prism binocularshave a slim and straight design. This design makes them easy to hold and use for a long time. They use roof prismswhich allow light to pass in a straight path, making the binoculars compact and light.
The body is usually waterproofand fog-resistant. This helps in bad weather and wet conditions. The lenses are often coated to give clear and bright images.
- Compact and lightweight for easy carrying
- Straight design fits well on tripods
- Good for bird watching and hiking
- Waterproof and fog-resistant for outdoor use
- Sharp and clear images with coated lenses
Necessary Tools And Accessories
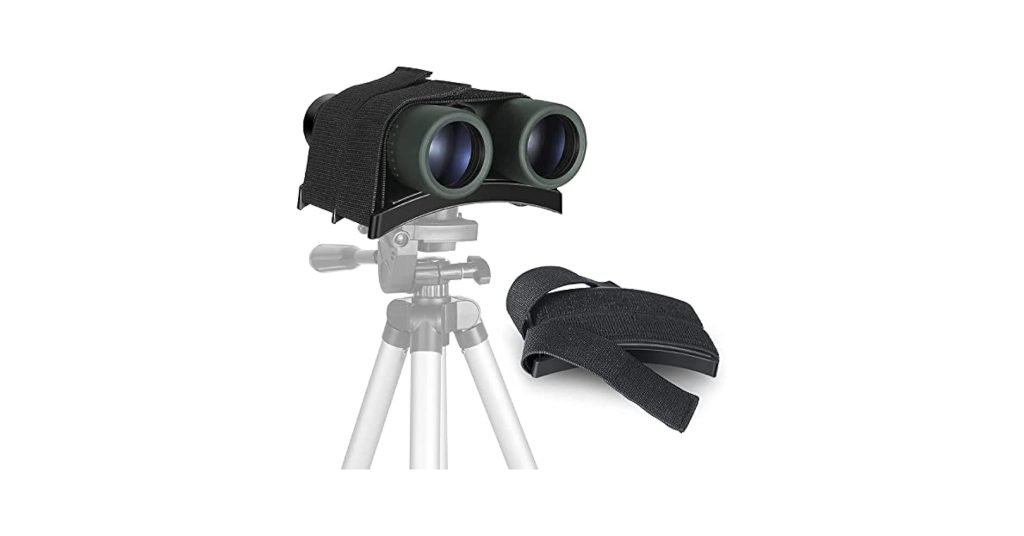
Tripod mounting platefits on the bottom of roof prism binoculars. It must match the binocular’s thread size.
Thread adapterhelps connect the binoculars to the tripod if sizes differ. Usually, it’s 1/4 inch or 3/8 inch.
Tripod headsupports the binoculars and allows easy angle adjustment. A pan-tilt head works well for smooth movement.
- Quick-release plate for easy attachment and removal.
- Rubber washers to protect binoculars from scratches.
- Allen keys or screwdrivers to tighten screws.
Additional accessoriescan improve use and comfort. Neck straps or harnesses reduce arm strain.
A carrying case protects the binoculars during transport. Lens covers keep lenses clean when not in use.

Credit: www.amazon.com
Preparing The Binoculars
Most roof prism binoculars have a tripod adapter socketat the center hinge. This socket is usually covered by a small plastic or metal cap. Remove this cap carefully to expose the threaded hole. This hole fits standard tripod screws.
Check the socket sizebefore attaching. Most tripod screws are 1/4 inch, which matches the socket size on binoculars. If your tripod screw does not fit, use a tripod adapter ringto make it compatible.
Keep your lens caps onto protect the lenses from dust and scratches while attaching the tripod. This helps maintain clear visionand keeps the binoculars safe. Lens caps can be secured with straps or clips to avoid losing them during setup.
Attaching The Tripod Adapter
Choose an adapter that matches your binocular’s tripod socket size. Most roof prism binoculars have a standard 1/4-inch thread. Some adapters come with a locking ring to secure the binocular firmly.
Ensure the adapter fits snugly without forcing it. A loose adapter can cause shaky views. A tight fit keeps your binoculars stable on the tripod.
- Check the adapter type: screw-on or clamp-on.
- Match the thread size with your binocular’s socket.
- Look for adapters made of durable materials like metal.
Attach the adapter directly to the tripod socket on the binocular’s center hinge. Align it carefully so the binoculars sit straight. This helps maintain balance and prevents tipping.
Once attached, tighten the adapter securely. Avoid over-tightening to prevent damage. Your binoculars are now ready for steady, hands-free use.
Mounting Binoculars On Tripod
Find the tripod adapter on the roof prism binoculars. This adapter is usually found on the front or center of the binoculars. Align the adapter with the tripod’s mounting screw. The screw should fit snugly into the adapter’s hole.
Turn the screw clockwise to tighten. Make sure the binoculars sit firmly on the tripod without wobbling. Avoid over-tightening to prevent damage to the binoculars.
- Check the binoculars’ balance on the tripod.
- Adjust the angle using the tripod’s head.
- Lock the tripod’s adjustment knobs to hold the position.
- Test stability by gently shaking the binoculars.
Adjusting For Optimal Viewing
Adjust the tripod height to match your eye level. This helps in comfortable viewingand reduces neck strain. Tilt the binoculars to find the best angle. Small angle changes can improve clarity and focus.
Keep the binoculars steady by tightening all tripod knobs. This prevents shakingand keeps the image clear. Use a tripod with a smooth pan and tilt headfor easy movement.
- Set the tripod legs on a firm surface for better stability.
- Make small height changes and test the view each time.
- Adjust the binoculars slowly to avoid losing sight of the target.
- Check all connections to avoid wobbling.
Troubleshooting Common Issues
Loose attachments can cause your binoculars to wobble or fall. Tighten all screws carefully but avoid over-tightening. Use a small wrench or screwdriver that fits well. Check the tripod plate and mounting screw for damage or wear. Replace any worn parts to keep a strong hold.
Alignment problems often cause blurry or tilted views. Make sure the binoculars sit flat and straight on the tripod plate. Adjust the tripod head to level the binoculars. Use the tripod’s spirit level if available. Confirm the mounting screw is fully tightened without forcing it.
Maintenance Tips
Regular check-ups keep your roof prism binocularsworking well. Look for loose screwsor parts. Tighten anything that feels loose. Check the tripod attachmentpoint for stability. This helps prevent damage during use.
Cleaning is key for clear views. Use a soft brushto remove dust from lenses. Avoid using fingers or rough cloths that can scratch. Store binoculars in a padded caseto protect them from bumps and dirt. Keep them away from extreme heat or moisture.
- Check screws and attachment points monthly.
- Use lens cleaning cloths only.
- Store in a dry, cool place.
- Keep binoculars in a case when not used.
Frequently Asked Questions
How Do I Attach A Tripod To Roof Prism Binoculars?
Locate the tripod adapter socket on your binoculars’ center hinge. Screw the tripod adapter securely into this socket. Attach the tripod plate to the adapter, then mount the binoculars onto your tripod. Ensure all connections are tight for stable viewing.
What Tripod Adapter Fits Roof Prism Binoculars?
Most roof prism binoculars use a standard 1/4-inch tripod adapter. Check your binoculars for a threaded socket on the center hinge. Purchase a compatible adapter if not included. Using the correct adapter ensures a secure connection to the tripod.
Can I Use Any Tripod With Roof Prism Binoculars?
Yes, as long as the tripod supports the weight of your binoculars. Ensure it has a standard mounting plate compatible with your binoculars’ tripod adapter. Lightweight, sturdy tripods work best for stable and comfortable observation sessions.
Why Attach A Tripod To Roof Prism Binoculars?
Tripods provide stability, reducing hand shake and fatigue during long viewing. They improve image clarity and comfort, especially at high magnifications. Using a tripod is ideal for birdwatching, astronomy, and extended outdoor observations.
Conclusion
Attaching a tripod to roof prism binoculars makes viewing steady and clear. It helps reduce shaking and lets you enjoy long observation times. Follow the steps carefully for a secure fit. Use the right adapter and tighten screws properly. This simple setup improves your outdoor experience greatly.
Try it next time for better comfort and focus. Practice a few times to get confident with the process. Steady binoculars mean sharper images and less eye strain. Keep your gear ready and enjoy nature’s details like never before.