If your stabilized binoculars aren’t working right, it can be frustrating and disappointing. You rely on them for clear, steady views, whether you’re birdwatching, hiking, or enjoying a game.
But don’t worry—repairing the mechanism might be easier than you think. In this guide, you’ll discover simple steps to fix common problems and get your binoculars back to perfect condition. Keep reading, and you’ll learn how to save money and extend the life of your favorite gear.

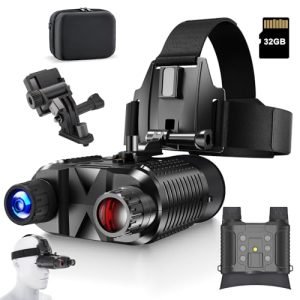
Credit: www.target.com
Tools And Materials Needed
Essential tools include small screwdrivers, tweezers, and lubricants for smooth repairs. Gather replacement parts like springs or gears to fix damaged mechanisms. Clean workspace and good lighting help ensure precise handling of binocular components.
Essential Repair Tools
You need a small screwdriver for opening tiny screws. Tweezers help pick up small parts. A magnifying glass is useful to see small details. Lubricating oil is needed for smooth movements. Cleaning cloths keep things clean. Adhesive helps stick parts together if needed.
Replacement Parts
Keep extra screws handy. Rubber seals are important to stop dust. Lens caps protect the glass. Springs help in movement. Wires may be needed for connections. Gears are essential for mechanism.
Safety Equipment
Safety goggles protect your eyes. Gloves keep your hands safe. Use a dust mask to avoid inhaling particles. Earplugs are good if it’s noisy. Apron keeps clothes clean. First aid kit is useful for small injuries.
Diagnosing Common Issues
Mechanical failures often cause binoculars to stop working properly. Look for parts that are loose or stuck. Check if the focus wheel moves smoothly. Tighten screws if they are loose but be gentle. Listen for unusual sounds when adjusting the binoculars.
Optical misalignment can blur the view or create double images. Shine a light through the lenses and see if the beams line up. Check if the prisms inside the binoculars are shifted. Realign prisms carefully using small tools and steady hands.
Electrical problems affect stabilized binoculars with power functions. Test batteries first and replace them if needed. Check wires and connections for breaks or corrosion. Use a multimeter to measure voltage and continuity. Repair or replace damaged parts to restore power.
Disassembling The Binoculars
Carefully remove the outer casingby loosening screws. Keep the screws safe to avoid losing them. Use gentle force to avoid damage.
Handle the internal componentswith care. These parts are delicate and easy to break. Avoid touching lenses with fingers to prevent smudges.
Organize small parts in a clean container. Group screws and tiny pieces by size and type. This helps when reassembling the binoculars later.
Repairing Mechanical Components
Stabilization motors in binoculars help keep the image steady. Check the motors for any signs of damage or wear. Replace any broken parts carefully to avoid further issues.
Moving parts need regular lubrication to work smoothly. Use a light machine oil or a special lubricant made for optics. Apply a small amount to all gears and joints. Avoid over-lubrication, which can attract dust and dirt.
Gears inside the binoculars may wear out over time. Inspect them for cracks or missing teeth. Replace worn gears with exact matches to keep the mechanism working properly. Tighten any loose screws to prevent misalignment.
Realigning Optical Elements
Adjusting lensesrequires careful handling. Loosen screws gently to move lenses slightly. Align lenses so images are clear and sharp. Tighten screws without shifting lenses to keep alignment stable.
Calibrating image stabilizersinvolves checking the stabilizer’s response. Power on the binoculars and gently move them. The image should stay steady. If not, adjust the stabilizer controls or sensors carefully.
Testing focus mechanismis crucial. Rotate the focus wheel slowly. The image should become clear and crisp. If it feels stiff or loose, lubricate or tighten the mechanism for smooth movement.
Reassembling And Testing
Carefully place each part back into its original spot. Use small tools to avoid damage. Ensure all screws are tight but not over-tightened. Check that lenses and prisms align properly. Missing or loose parts cause poor image quality.
Test all functions by moving focus and zoom controls. Look through the binoculars to see if the view is clear. Listen for unusual sounds like grinding or clicking. Smooth operation means parts fit well.
| Calibration Task | Purpose | How to Do It |
|---|---|---|
| Focus Adjustment | Sharpens image clarity | Turn focus knobs while observing a distant object |
| Alignment Check | Ensures images from both lenses match | Look through binoculars and adjust prisms if needed |
| Diopter Setting | Balances view for different eye strengths | Adjust diopter ring for clear vision in both eyes |
Maintenance Tips To Prevent Future Issues
Keep binocular lenses clean using a soft, dry cloth. Avoid harsh chemicals or rough materials. Gently wipe the lenses after use to remove dust and fingerprints. Use a blower brush to clear dust from small crevices. Regular cleaning helps maintain clear vision and smooth mechanism function.
Store binoculars in a dry, cool place. Use a protective case to prevent damage from drops or bumps. Avoid leaving them in direct sunlight or damp areas. Proper storage keeps the internal parts safe and extends the device’s life.
- Check for loose screws or parts every few months.
- Test the focus and stabilization to ensure smooth operation.
- Look for signs of wear or damage early to fix problems quickly.
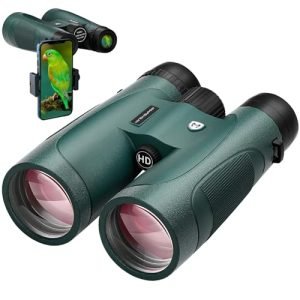
Credit: www.bestbinocularsreviews.com

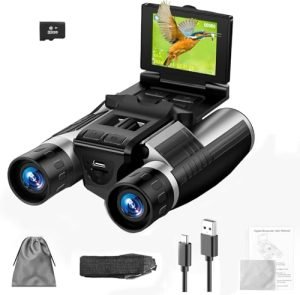
Credit: www.amazon.com
Frequently Asked Questions
How Do I Identify Issues In Stabilized Binocular Mechanisms?
Check for image shake, alignment problems, or unusual noises. Inspect lenses and moving parts carefully. These signs indicate mechanism faults needing repair or adjustment.
What Tools Are Needed To Repair Binocular Stabilization?
You’ll need small screwdrivers, cleaning cloths, lubricants, and magnifying tools. Precision instruments help avoid damage. Proper tools ensure effective and safe repairs.
Can I Fix Binocular Stabilization At Home?
Basic repairs like cleaning and tightening can be done at home. Complex issues may require professional service. Always follow manufacturer guidelines to avoid voiding warranties.
How Often Should I Maintain Stabilized Binoculars?
Regular maintenance every 6-12 months ensures optimal performance. Frequent use or harsh environments may require more frequent checks. Proper care extends binocular lifespan.
Conclusion
Repairing stabilized binocular mechanisms takes patience and care. Follow each step slowly and carefully. Check parts often for wear or damage. Use the right tools to avoid causing more harm. Keep your binoculars clean and dry during the process. Small fixes can improve your viewing experience a lot.
Regular maintenance helps your binoculars last longer. Stay calm and take breaks if needed. Soon, your binoculars will work smoothly again. Enjoy clearer views and better focus every time you use them.